Are experts always right? Usually, but not always. Here's an example. Every expert says you have to run the most up-to-date version of WordPress, plugins, and themes on your site. That's generally true. But, there are times when you should downgrade WordPress to an earlier version - at least temporarily. In this article, you learn when it's a good idea to downgrade and how to do it.
What does downgrade WordPress mean?
Downgrade is the opposite of update. When we update a piece of software, we install the latest version on our site. Updates make improvements, fix bugs, and repair security holes.

Downgrade the WordPress version means you remove the latest release and replace it with an older version.
WordPress is constantly updating its core software. Since 2007, there have been a hundred or more WordPress updates.
When to downgrade WordPress
Though downgrading the current version of WordPress might sound counterintuitive, it's not a radical idea.
WordPress updates sometimes produce significant site changes, though they are not always visible to the user. On the backend, PHP changes, for instance, help to make the database run smoother. On the frontend, block editors can improve page load times.
Now here's the problem.
The changes created by a new WordPress release sometimes cause major conflicts (called "unexpected behaviors") with the plugins or themes on your site. Conflicts cause problems, like buggy performance or worse. Here's an example. According to the Search Engine Journal, the release of WordPress 5.5 may have caused 50,000 site crashes because it contained a bit of code that clashed with out-of-date plugins or themes. Unexpected behavior indeed.
If your site displays unexpected behaviors after a WordPress upgrade, your first corrective action might be a WordPress downgrade.
Why downgrade WordPress
Installing an older version of WordPress on your site is a temporary strategic move. It's not a permanent solution.
Downgrade WordPress so that you can get your site working properly. Diagnose the root cause, fix the problem, and then return to the latest version of WordPress.
The most common causes are conflicts with plugins or themes, so check those first.
There are many ways to run a plugin and theme inspection. Here is a simple solution, though it takes a bit of time.
- Downgrade WordPress to a version that you used before the site problems emerged (see below for downgrade methods).
- Check your site. If it works fine, you know the problem is probably a conflict. If the site still doesn't work, you have other issues that require a deep dive.
- Deactivate every plugin. If your site works fine, you know a plugin is the root cause.
- Activate the plugins one at a time. Check your site's performance each step of the way until you isolate the plugin (or plugins) causing problems. Once you find the troublesome plugin, make sure it is up to date and delete it altogether.
- If you can't trace the problem to a plugin, switch to a basic theme like Twenty One and repeat steps for themes.
WordPress downgrade methods
There are three ways to downgrade WordPress.
- Use a plugin (WP Downgrade)
- Do a manual downgrade
- Restore a backup
- Caution: make sure you back up your files and database before starting any downgrade.
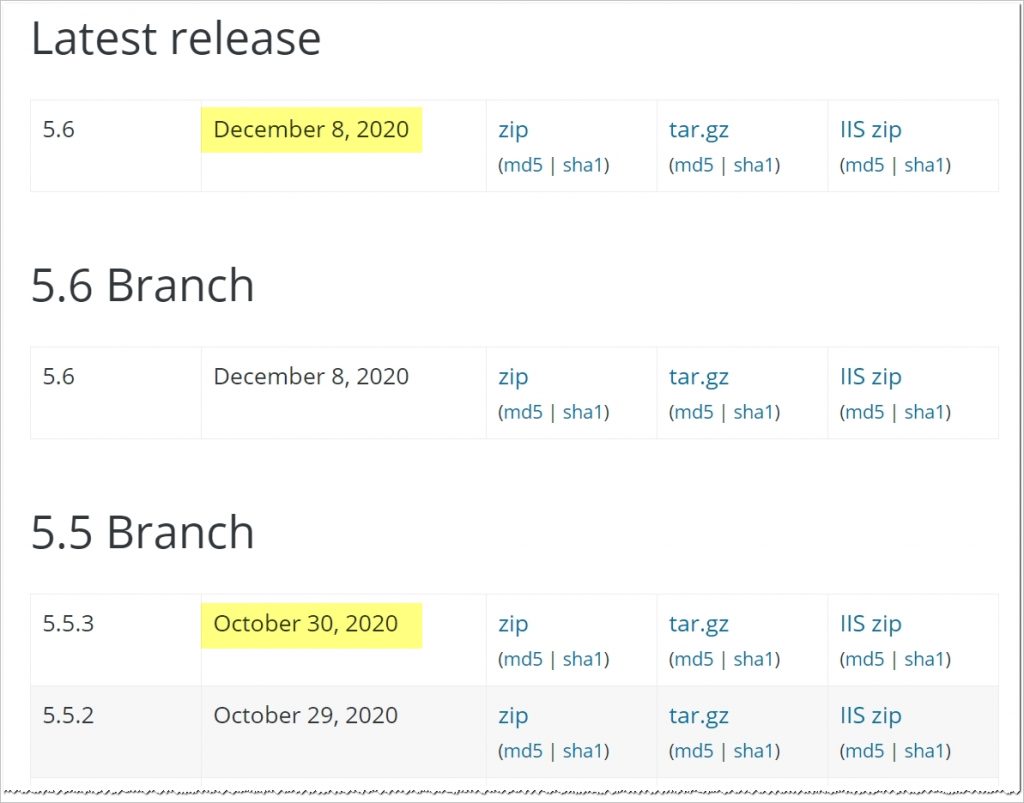
When you downgrade, there are many older versions to choose from. As a general rule, choose the release just before the current version. If you go back too far, you might open your site to security risks or feature failures.
In the image below, the latest release is dated December 20, 2020. The most recent version just before that is 5.5.3 from October 30, 2020.
Use a plugin
There's a plugin for almost everything these days, including WordPress downgrades. There are a few options around, but we recommended WP Downgrade. It gets great reviews, works well, and is free.
If your site is working and you're able to access the Plugin panel, this is the preferred option because it's easy to run and takes just a few minutes to complete.
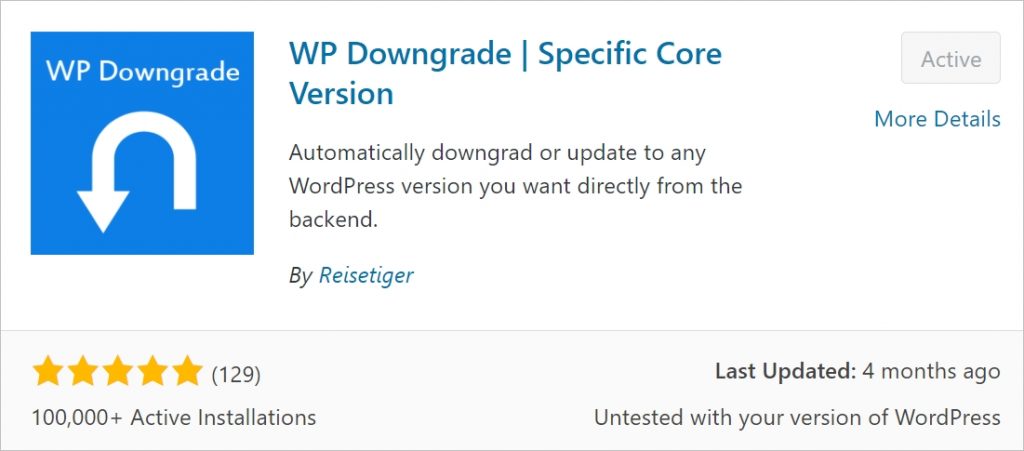
- Install and activate WP Downgrade.
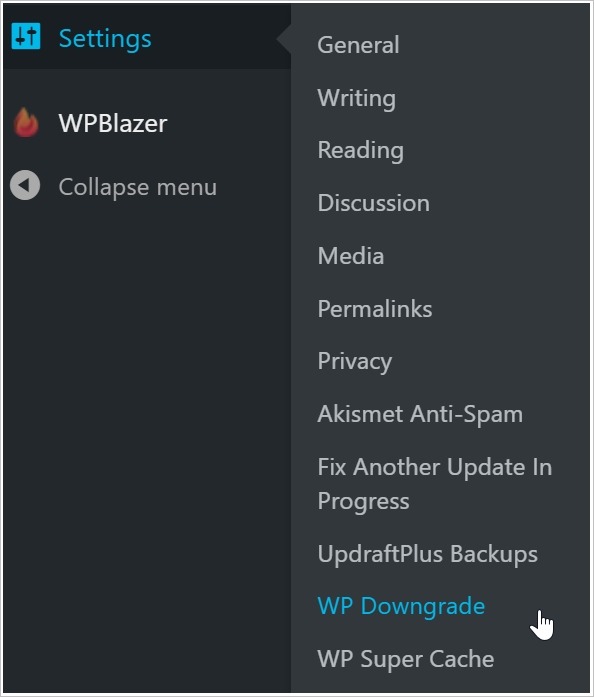
- Go to the WP dashboard and click Settings > WP Downgrade.
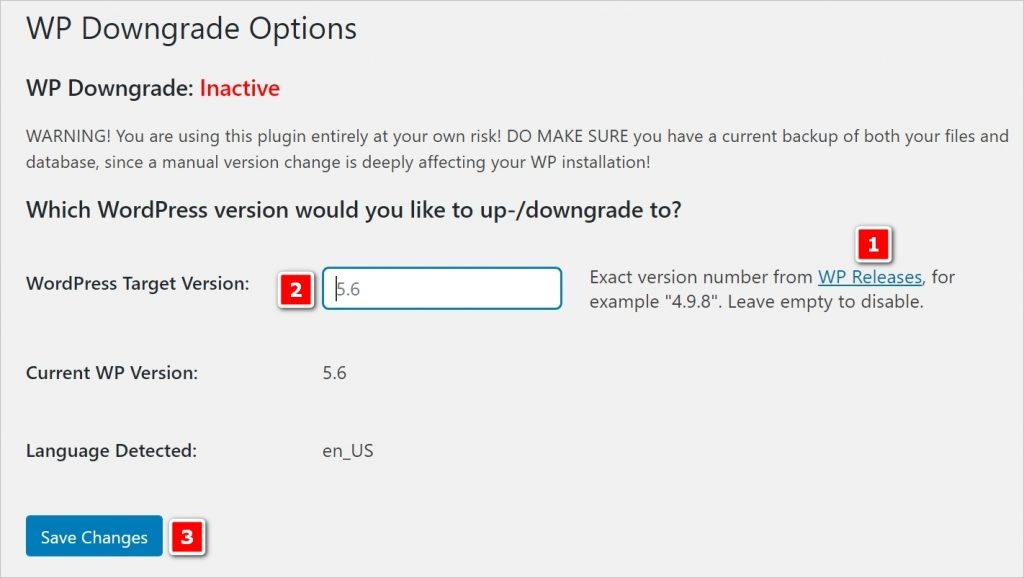
- On the WP Downgrade dashboard, click the WP Releases link and find the version you want to install on your site. Enter that version number in the field and click Save Changes.
- Click the Downgrade Core button.

Manual downgrade
Compared to the plugin option, this method is a bit more complex, but it might be your only choice if your site crashed and you can't access the admin dashboard.
Before you start a manual version downgrade of WordPress, make sure you have an FTP client that can access your site's root folder on the host's server.
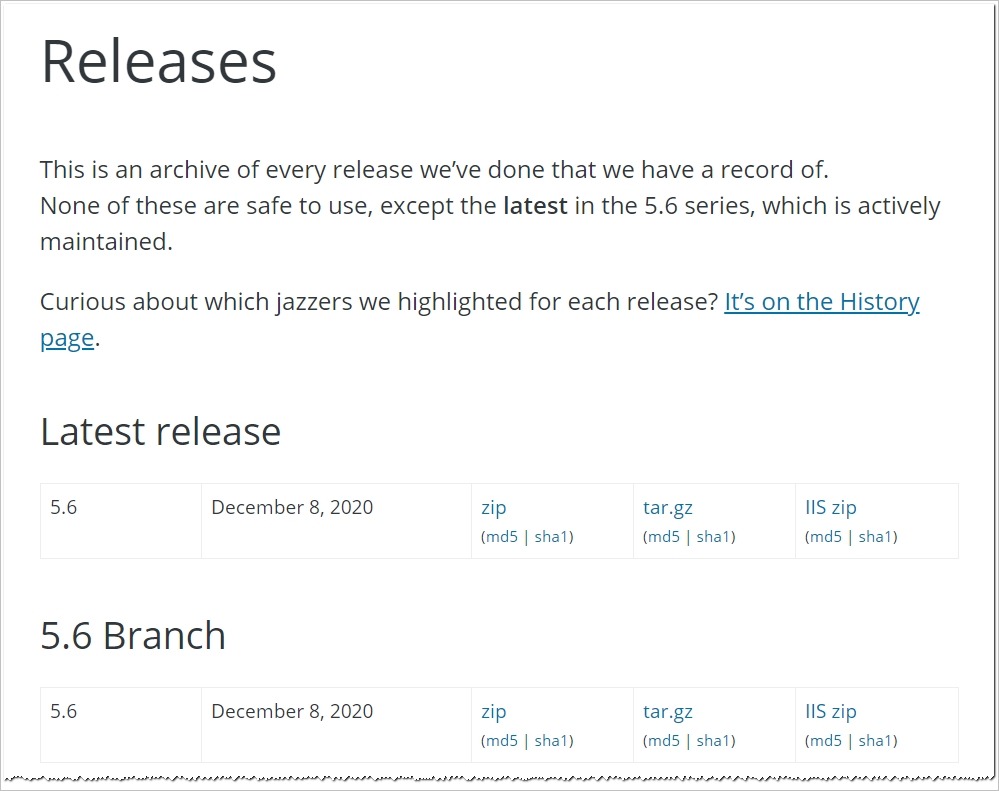
- Go to the WordPress release archive site and download the version you want to install on your site. Save the zip file in a location on your computer that is easy to find.

- Unzip the zip file inside a new folder.
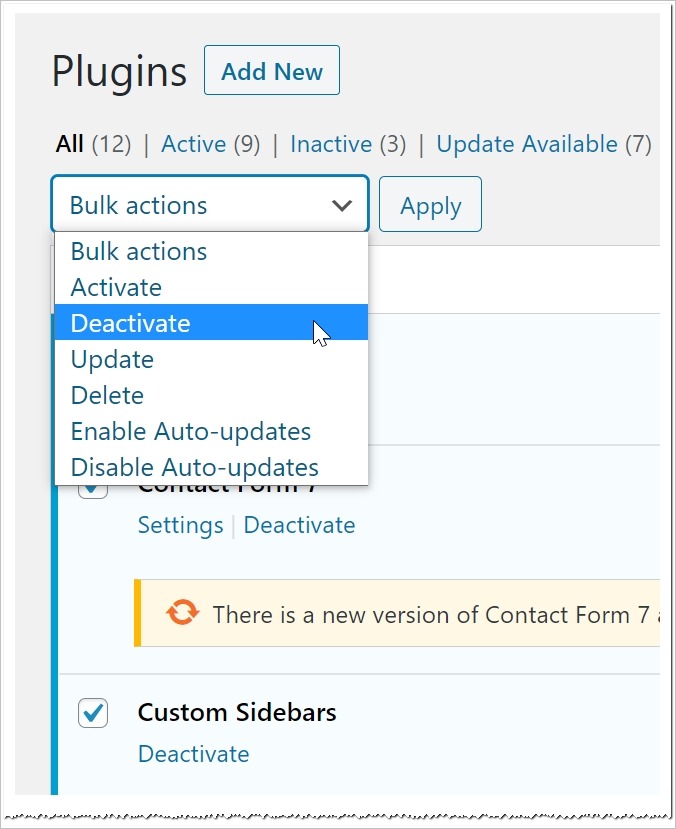
- If you have access to your site's admin dashboard, deactivate all of your plugins. Save time by using the Bulk actions tool.
- If you can't access the dashboard, scroll down for a plugin workaround.
- Log out of your WordPress site.
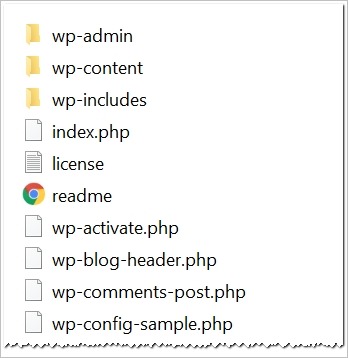
- Use the FTP client to open your site's root folder and delete two folders: wp-admin and wp-includes.
- DO NOT delete any other folders, especially the wp-content folder.
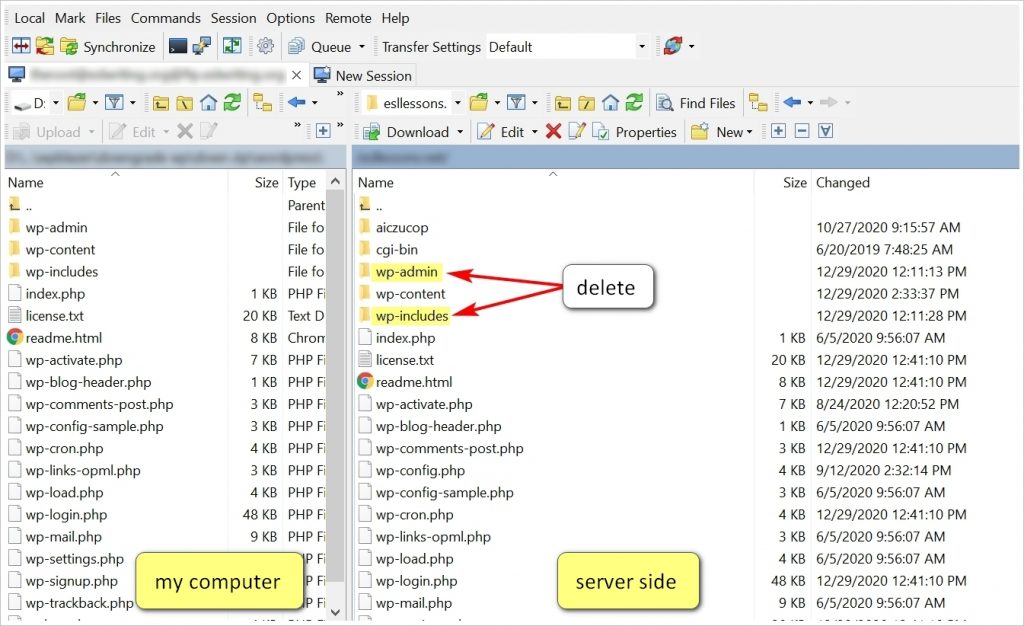
- If you couldn't deactivate your plugins, scroll down and complete the plugin workaround before going on to the next step. Otherwise, go on to the next step.
- Copy all the files & folders from the computer side to the server-side - except for the wp-content folder.
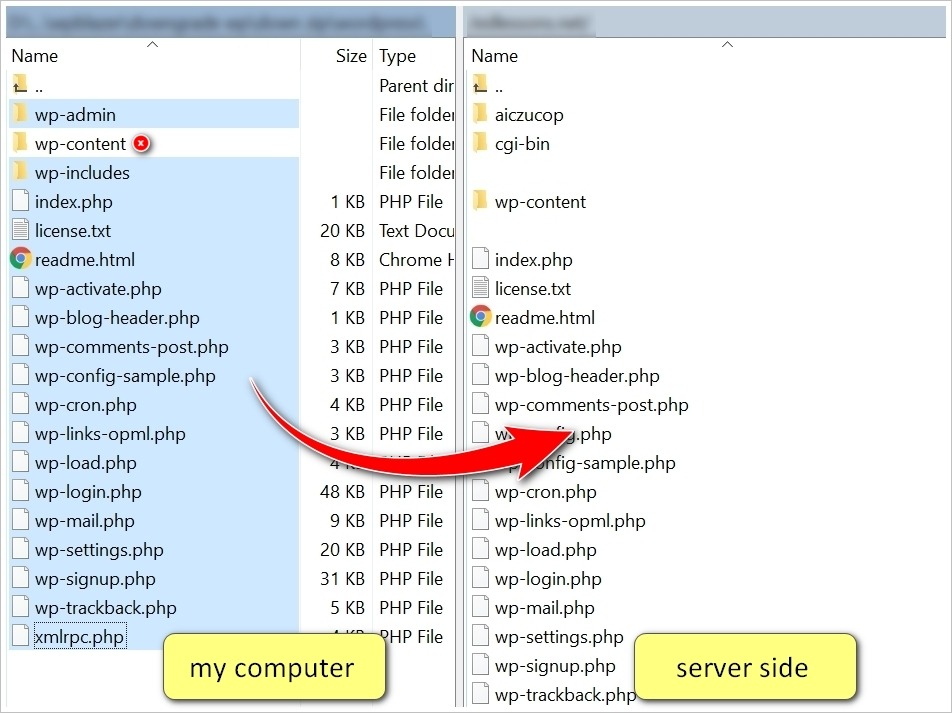
- Go back to your website and log in.
- If prompted, click the Update WordPress database button.
- Activate your plugins one by one and check your site's performance.
Plugin Workaround
If you can't access your site's dashboard and deactivate the plugins, here is a workaround. Make sure you complete these steps before copying files to the server.
- Open the wp-content folder on the server.
- Rename the plugin folder. This will deactivate the plugins.
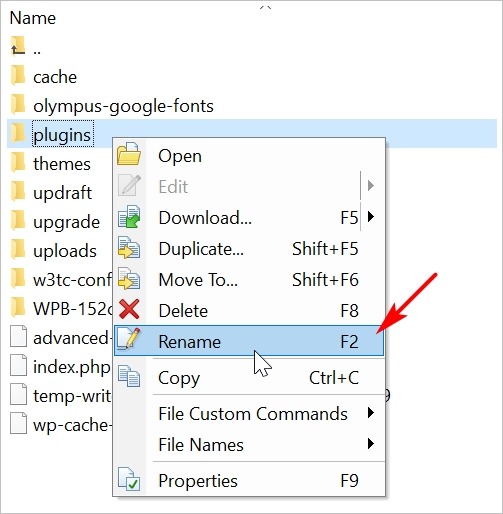
- After you complete the manual downgrade steps, change the folder name back to "plugins."
Use restore from backup
If unexpected behaviors have really messed up your site and content, you could restore your WordPress site by using backup files. It's a dramatic step that will cause you to lose recent content or site changes - assuming you don't do regular backups.
We covered site restorations in a different article. For more information, see:
Rolling back WordPress
Up to this point, we've shown you how to downgrade the version of WordPress in order to find and repair the cause of site crashes or other unexpected behaviors.
There is another approach. Leave WordPress alone and instead rollback the version of individual plugins and themes. This is a good approach if site problems start to appear after a big plugin or theme update - but you're not sure which one (or ones) are causing the problems.
- Install and activate the WP Rollback plugin.
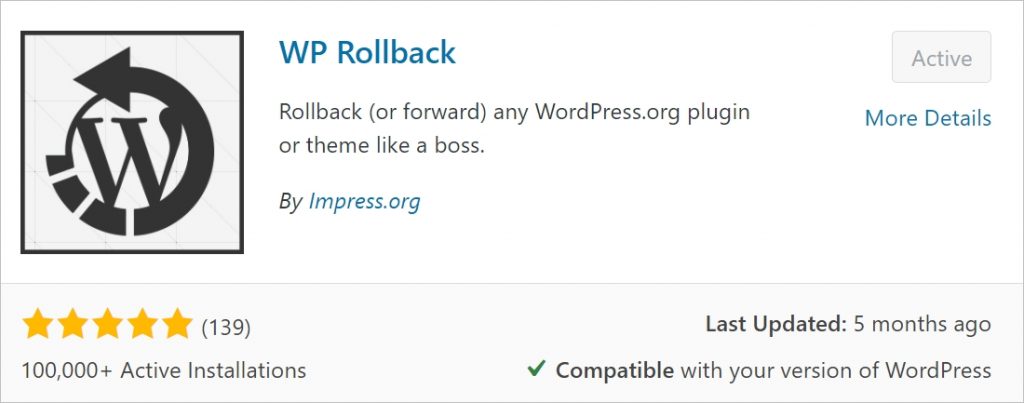
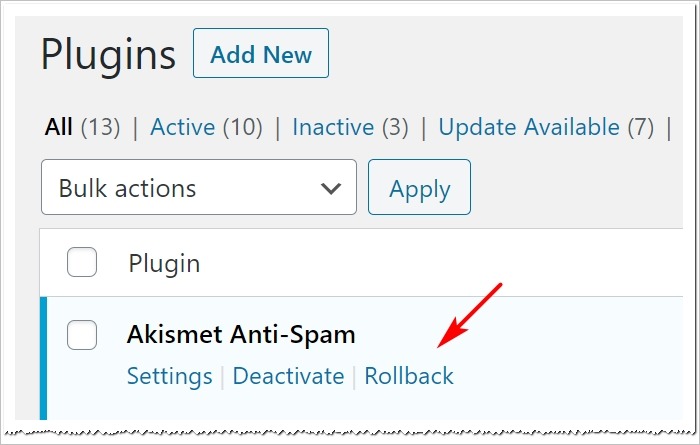
- Go to the Plugins page, select a plugin, and click Rollback.
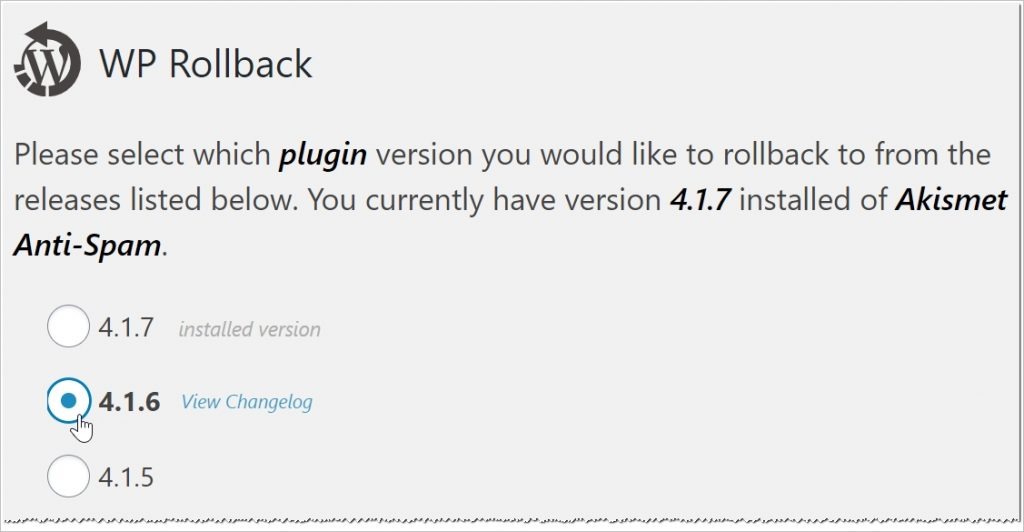
- Select a version one step behind the installed version and then click the Rollback button.
- Click Rollback in the confirmation pop-up box.
- Check your site for performance issues.
- Repeat for each plugin.
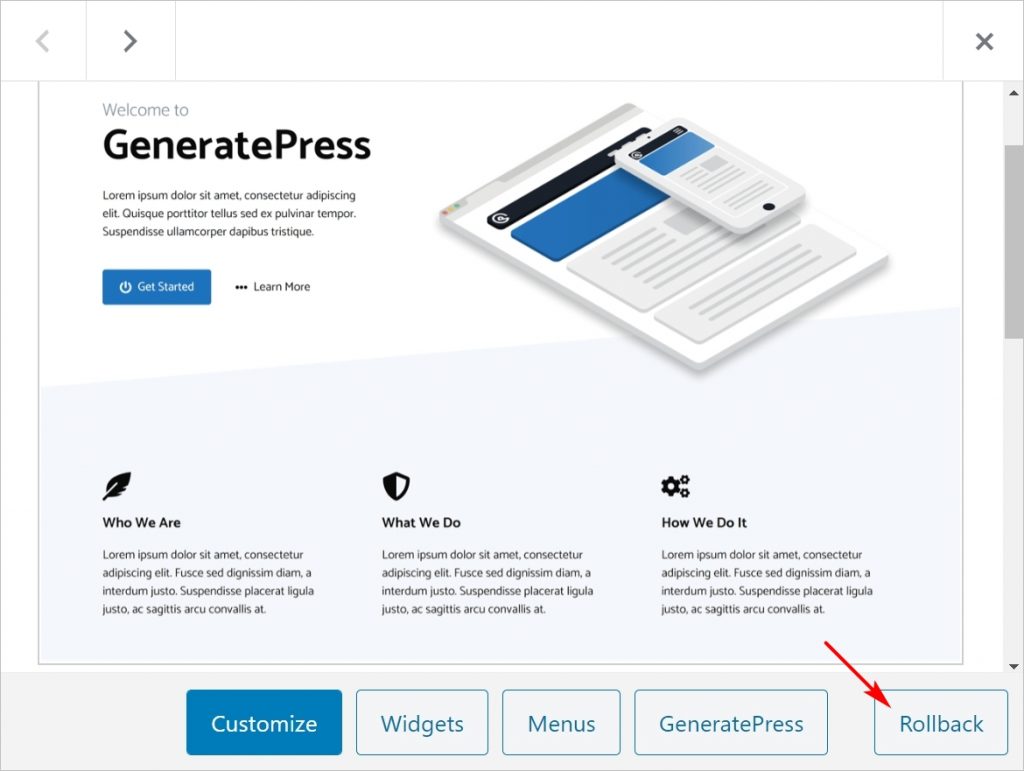
- To rollback a theme, go to Appearance > Themes and then click Theme Details.
Conclusion
It's important to keep all aspects of your site update. That minimizes security risks and keeps advanced features working smoothly.
Sometimes, you should break some rules to fix site problems, like downgrading WordPress or reverting to older versions of plugins and themes.
Of course, backups are important before you launch any sort of version change. If you run multiple sites, that work could take a while. Tools like WPBlazer can help by streamlining tasks from a single dashboard. When it comes to fixing site problems, we need all the help we can get to source the problem and repair the damage in as little time as possible.
