Have you ever needed to reinstall a platform or operating system? It can be scary, especially if you’ve spent a lot of time and effort tweaking and customizing. What if you need to reinstall WordPress? Is it a scary prospect as well? It doesn’t have to be!
In this post, I’ll walk you through several reinstall methods. Several, because there are different reasons and needs behind why you might need to reinstall WordPress, and some of them might require a more nuclear approach.
Let’s start by outlining some of the reasons why a site owner may need or want to reinstall WordPress.
Table of Contents
1. Why You Might Want to Reinstall WordPress
2. How to Reinstall WordPress Without Losing Your Content
Backup Your WordPress Site
Reinstall WordPress from the Dashboard
Reinstall WordPress Using an FTP Client
Reinstall WordPress Using WP-CLI
3. Starting Fresh – Completely Uninstall and Reinstall WordPress
Download & Install via WordPress.org
Reinstall WordPress Using Softaculous
1. Why You Might Want to Reinstall WordPress
Just like the operating system on your desktop or mobile, WordPress is very stable. However, again, just as you may encounter issues where it’s necessary to reinstall an OS, you could also encounter issues that could mean you need to reinstall WordPress.
For example:
- Your WordPress site is hacked
- You have corrupt core files
- Compatibility issues
- Development and testing
Hacked WordPress Sites

There are a lot of steps to go through if you’ve been hacked, but the worst of it is trying to identify and remove whatever injections the hacker left behind. Depending on your site and your situation, you may need to reinstall WordPress.
Corrupt Core Files
There’s a long list of things that could go wrong, from plugins that break file paths, .htaccess files with errors, bugs or script errors in plugins or themes, and more.
Sometimes WordPress will provide you with an error message that will lead you right to the problem but other times you’ll have no clue.
Compatibility Issues
There are many reasons for compatibility issues—especially if you’re not diligent when it comes to keeping WordPress up to date. If you’re still using an old version of WordPress, you could have all kinds of problems if you try to install new plugins or themes. And vice versa—trying to install old, outdated plugins on a new version of WP.
Development and Testing
If you do development and testing on your site it’s highly unlikely you need a walk-through on how to reinstall WordPress. I keep a site strictly for testing purposes and reinstall WordPress regularly.
So, for the rest of you, here’s how you get can your WordPress site up and running again.
I’ll start with methods that will allow you to preserve your content.
2. How to Reinstall WordPress Without Losing Your Content
In most cases, a site owner will have content they want to keep. Even if you do have backups of your content somewhere, you don’t want to have to upload everything to your site again after a reinstall.
The following methods will preserve everything in your wp-content directory, which contains, at least, your:
- Plugins
- Themes
- Uploads
Additionally, you’ll maintain your database files - which is how WordPress stores and retrieves content from your site. Your database file includes:
- Posts
- Pages
- Categories
- Tags
- Comments
- And more
And finally, you won’t lose your wp-config.php file. This is the file WordPress looks for so it can connect to your database.
Backup Your WordPress Site
But first, before you do anything, the most important thing I’m going to tell you today is to back up your site before you go any further. If you don’t have any content you’re interested in you can skip this step, but for the rest of you, backups are critical - even if you never have to use them.
You do have several options to choose from. But make sure you pick a backup like WPBlazer’s that will back up everything, including databases.
Reinstall WordPress from the Dashboard
You’ll need to have access to your site’s admin for this method.
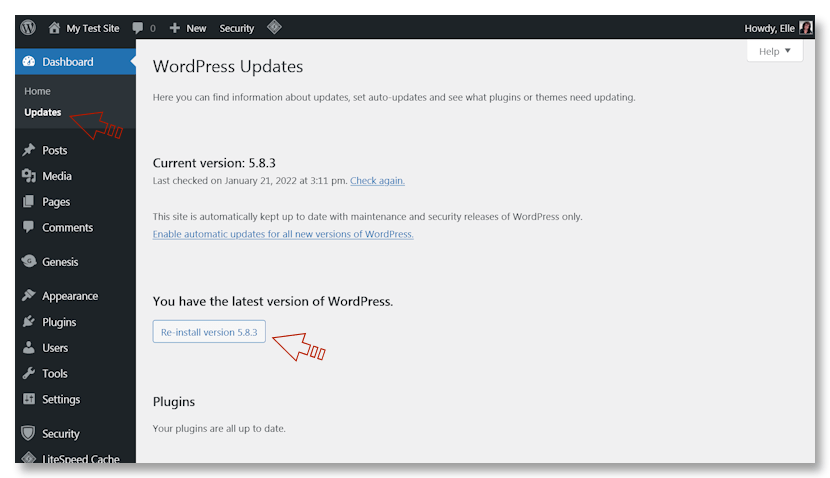
The quickest and easiest way to reinstall your core files is already built into WordPress.
Once you’ve logged in and accessed your admin panel, go to your Dashboard >Updates. Then find the Re-install Now button and click it.
WordPress will go to work, downloading and reinstalling the core files. Note that this process reinstalls the current version, so if you aren’t managing your WordPress site and keeping it up to date, this isn’t an option for you.
For example, in the screenshot below, my test site is running WP version 4.9. The only option here is to update to the current version—there is no option to reinstall WordPress.
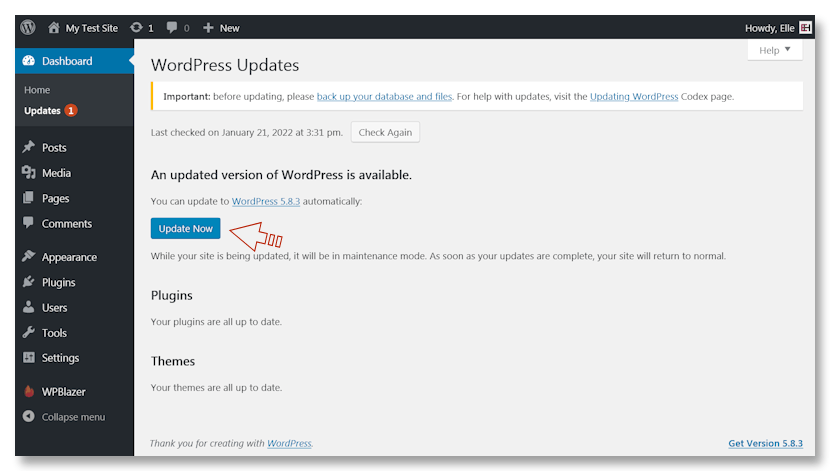
Assuming you do have the current version and you’ve gone ahead with the reinstall process, it should take less than a minute to finish.
Reinstall WordPress Using an FTP Client
If your WordPress isn’t running on the current version or you don’t have access to your admin page, the next option is to use an FTP client. If you don’t have one, there are many free versions to choose from. Here are a few options:
- WinSCP
- Cyberduck
- FileZilla
- CoreFTP LE
- FTP Voyager
The result of this method is the same as you would achieve by using the automatic WordPress reinstall outlined above—but the process will be manual.
Step #1: Download WordPress
If you have a copy of the current WordPress version already saved to your hard drive, you can use that. If not, head to wordpress.org, download it, and save it.
Step #2: Delete Your Content Directory
Once that’s done, unzip the file you just downloaded and delete the wp-content folder.
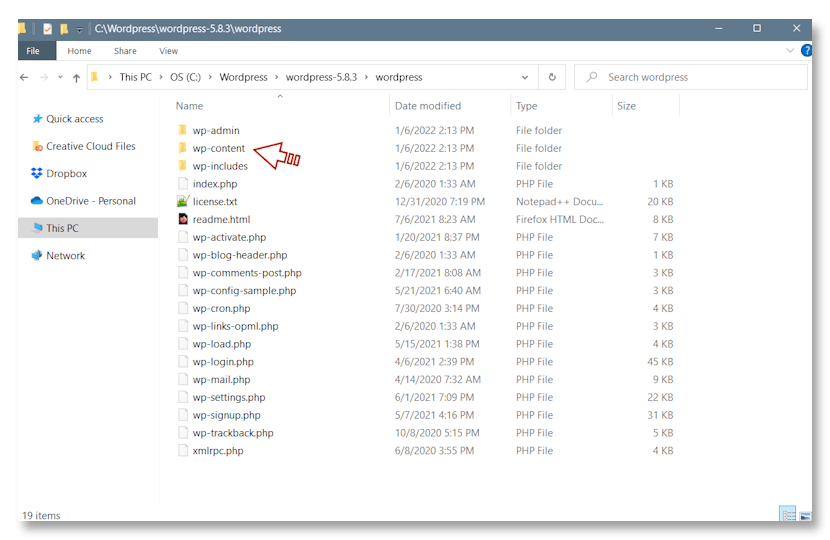
Step #3 Access Your FTP Client
Now you need to access your server via FTP.
To log into your server via an FTP client, you’ll need the username and password provided by your host when you first signed up. Use that and connect with your server.
Step #4: Upload WordPress
Once connected, you need to upload the files you just downloaded—except for the wp-content.php folder—to your existing WordPress installation. It’s typically in your domain’s root folder or the public_html. Just look for the location that has all the files similar to what you’re about to upload.
When you begin to upload you’ll get a message about overwriting existing files and folders. Depending on what program you’re using, the language will vary. Just choose yes, you want to overwrite existing files.
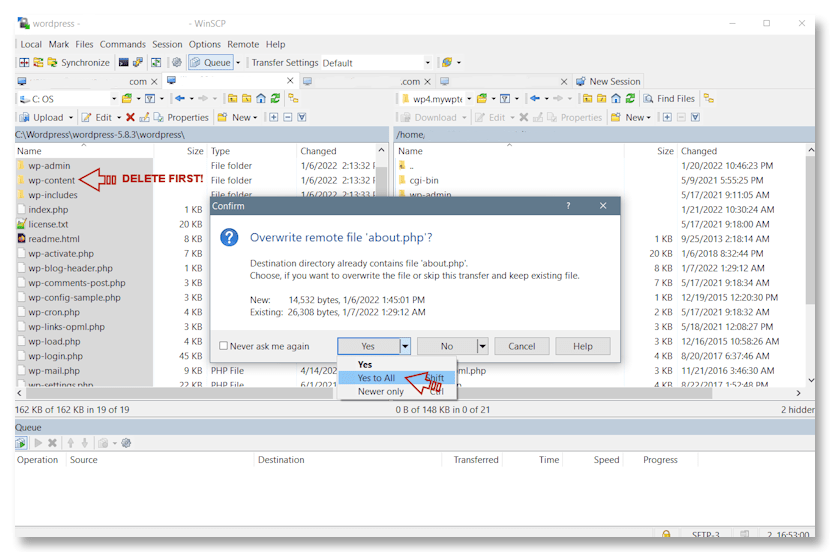
Once this is done all your core files will be brand new—with the exception of your content directory which contains everything you wanted to keep.
Side note: When following this process you won’t be overwriting wp-config.php since the file that’s included with a new install is called wp-config-sample.php. When done you will have both wp-config-sample.php and wp-config.php.
It is critical that your original wp-config.php not be deleted or overwritten.
Reinstall WordPress Using WP-CLI
WP-CLI is a command line tool that allows you to manage WordPress from the terminal. If you don’t know what I mean by command line and terminal, this probably isn’t the option for you.
For those of you who are curious, here’s a screenshot of what it looks like, via the developer’s site.
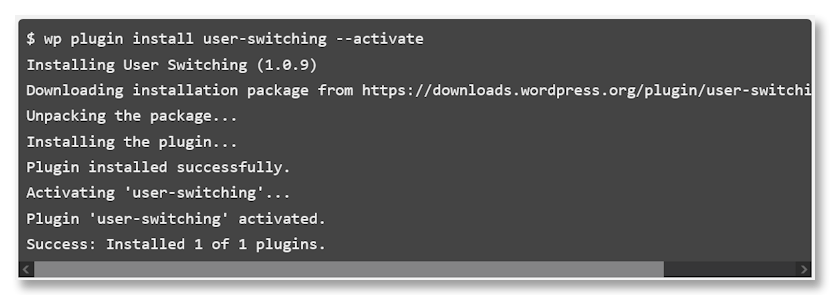
Source: wp-cli.org
From that example, you can see the commands to download and install a plugin. But you can use it to manage quite a bit of your installation.
If you do want to use the command line, use the following command:
wp core download --skip-content –force
This will keep your wp-content directory, just like in the other methods above.
3. Starting Fresh – Completely Uninstall and Reinstall WordPress
Sometimes, WordPress management may include a fresh start.
By starting fresh I mean you’ll have a clean slate. This method removes your current wp-content directory, so you lose everything. Your user profile, your posts, images, comments . . . everything.
To delete your current WordPress install you can use an FTP client, or you can use File Manager, which you can access via your cPanel. And unless you’ve changed passwords, you should be able to access either with the FTP login information you were provided with when you signed up with your host.
The following steps will be made using FTP.
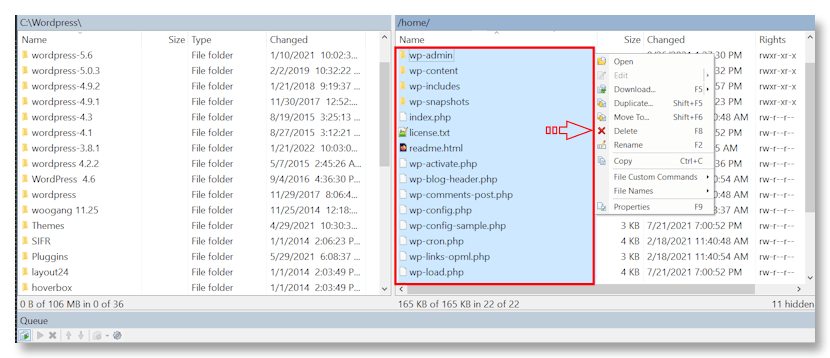
Navigate to the directory—folder—where you installed your WordPress core files. Select them all and delete them.
Step #1 Delete WordPress
Warning! Before deleting all files, copy/paste the wp-config.php file to your desktop—or anywhere that makes sense to you. You may need to refer to it in the next step.
Step #2. Delete Database (Optional)
Deleting your database as well isn’t necessary but if you’d like to get rid of it, follow this step.
Log into cPanel—or whatever equivalent your host offers—and navigate to Databases >MySQL Databases.

This will take you to a page that lists all current databases. Find and delete the correct databases.
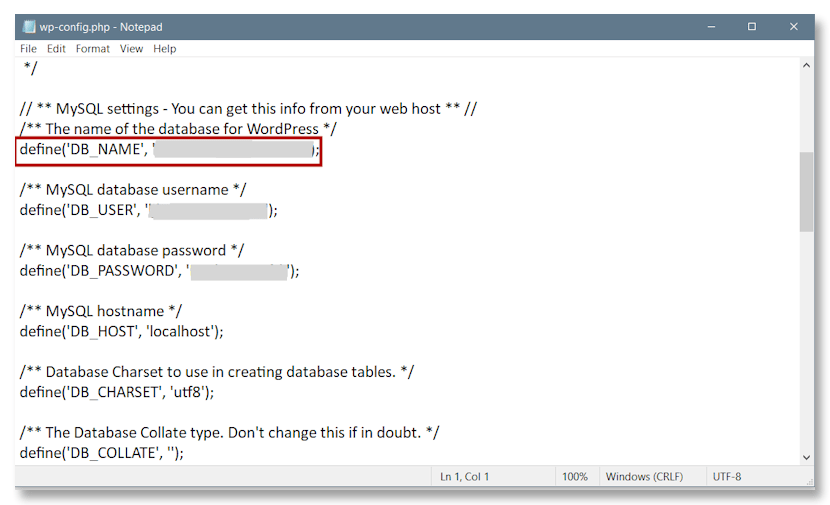
Warning! If you have more than one database listed, make sure you delete the correct database. Please refer to the wp-config.php file you copy/pasted in the previous step. You will find your database name there.
Once you’ve deleted your WordPress core files and databases, there is nothing left of your old WP install. It’s time to reinstall WordPress.
The number of ways you can do a clean install. Depending on your host, you may have options within your cPanel that can help with a WP install.
Download & Install via WordPress.org
Install WordPress using their 5-minute install guide.
Step #1: Download WordPress
Download the WP installation file to your hard drive and unzip it.
Step #2: Create a database
Log into your cPanel, or whatever panel your host provides. Go to MySQL Databases and create a new database.
Make sure you save your new database name and password somewhere safe.

Next, assuming you haven’t done this in the past, you’ll need to create a User.
Make sure you save your username and password somewhere safe.
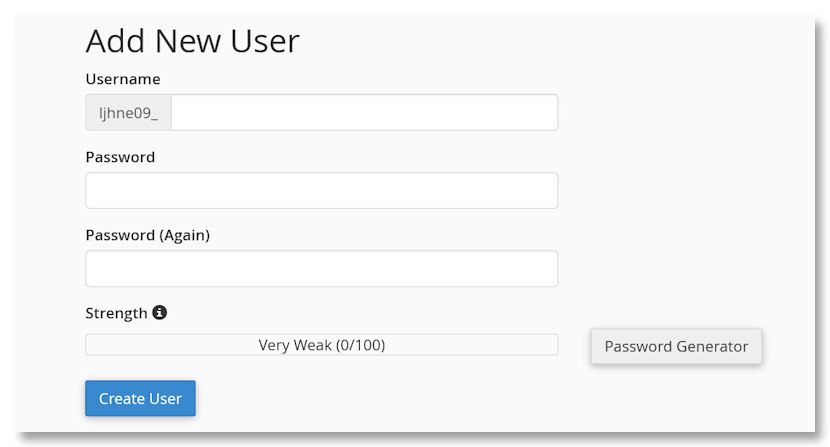
Then you need to connect the new user to your new WordPress database.

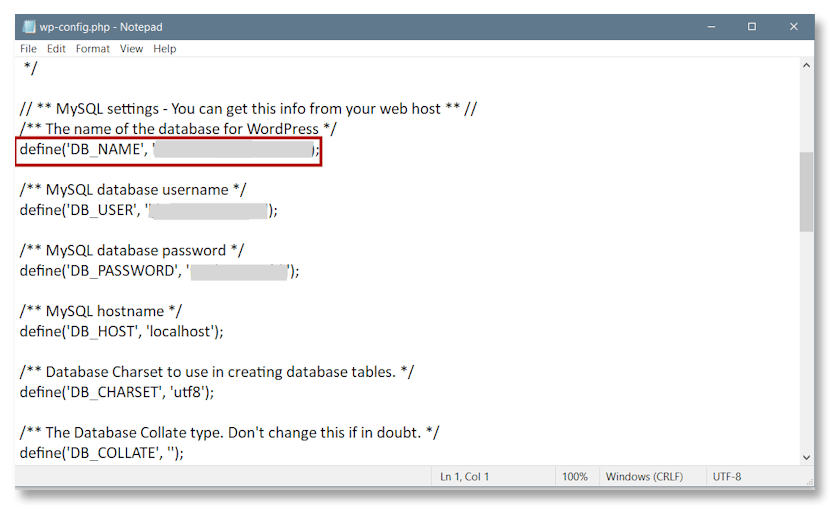
Step #3: Prepare your wp-config.php file
Find and open the wp-config file that’s in the unzipped WordPress installation file you downloaded and saved in step 1. Add the following that you created in step 2.
DB_NAME
The name of the database you created.
DB_USER
The username you created.
DB_PASSWORD
The password you generated.
Save your edited wp-config file.
Step #4. Upload WordPress
Log into your FTP client to start the upload process.
If your site was previously installed in the root of your domain, you’ll want to upload your files there. However, if you’re site was installed in a public_html directory, install there. If you have multiple domains and or subdomains, you’ll have a public_html folder.
Step #5. Run Install Script
Once all your files have been uploaded, you’ll need to access the install script via your browser. Go to:
http://example.com/wp-admin/install.php
Fill in the required database information and submit.
Step #6. Finish WordPress Setup
There are a few final setup requirements.
Since your aim is to reinstall WordPress, you’ll probably use your existing site title. But a new username might be a good idea, especially if your old username was admin.
Create a strong, unique password and make sure you save it somewhere safe.
Click install, and if everything went as it should, you’ll be prompted to log in to your WP admin.
Now you can install your themes and plugins.
Reinstall WordPress Using Softaculous
You can easily install WordPress from your cPanel. Go to the Solfaculous App Installer section and choose WordPress.

Conclusion
WordPress management can include several tasks and sometimes it may come to reinstalling WordPress.
As you can see from the above, it’s not a difficult thing to do, but it does require paying attention to detail and following the steps. And probably the most important step is making sure you back up everything before proceeding. Even if it’s your intention to start fresh with a brand new site, there’s always the chance you’ll want something from your content at a later date.
WordPress management can be simplified by using the right tools. Why not give WPBlazer a shot - especially if you manage multiple sites.
