
The WordPress .htaccess file is a configuration of the core .htaccess file that is used on Apache servers. A term .htaccess stands for hypertext access and it’s a file that’s used for server configuration. But it also allows you to configure specific directories on your server. For example, you could change your /downloads or /images directories.
Table of Contents
1. What is the WordPress .htaccess File?
2. Where is the WordPress .htaccess File Located?
Find Hidden WordPress .htaccess Files
Find Your .htaccess File Via Your Host’s File Manager
3. How to Create a .htaccess File
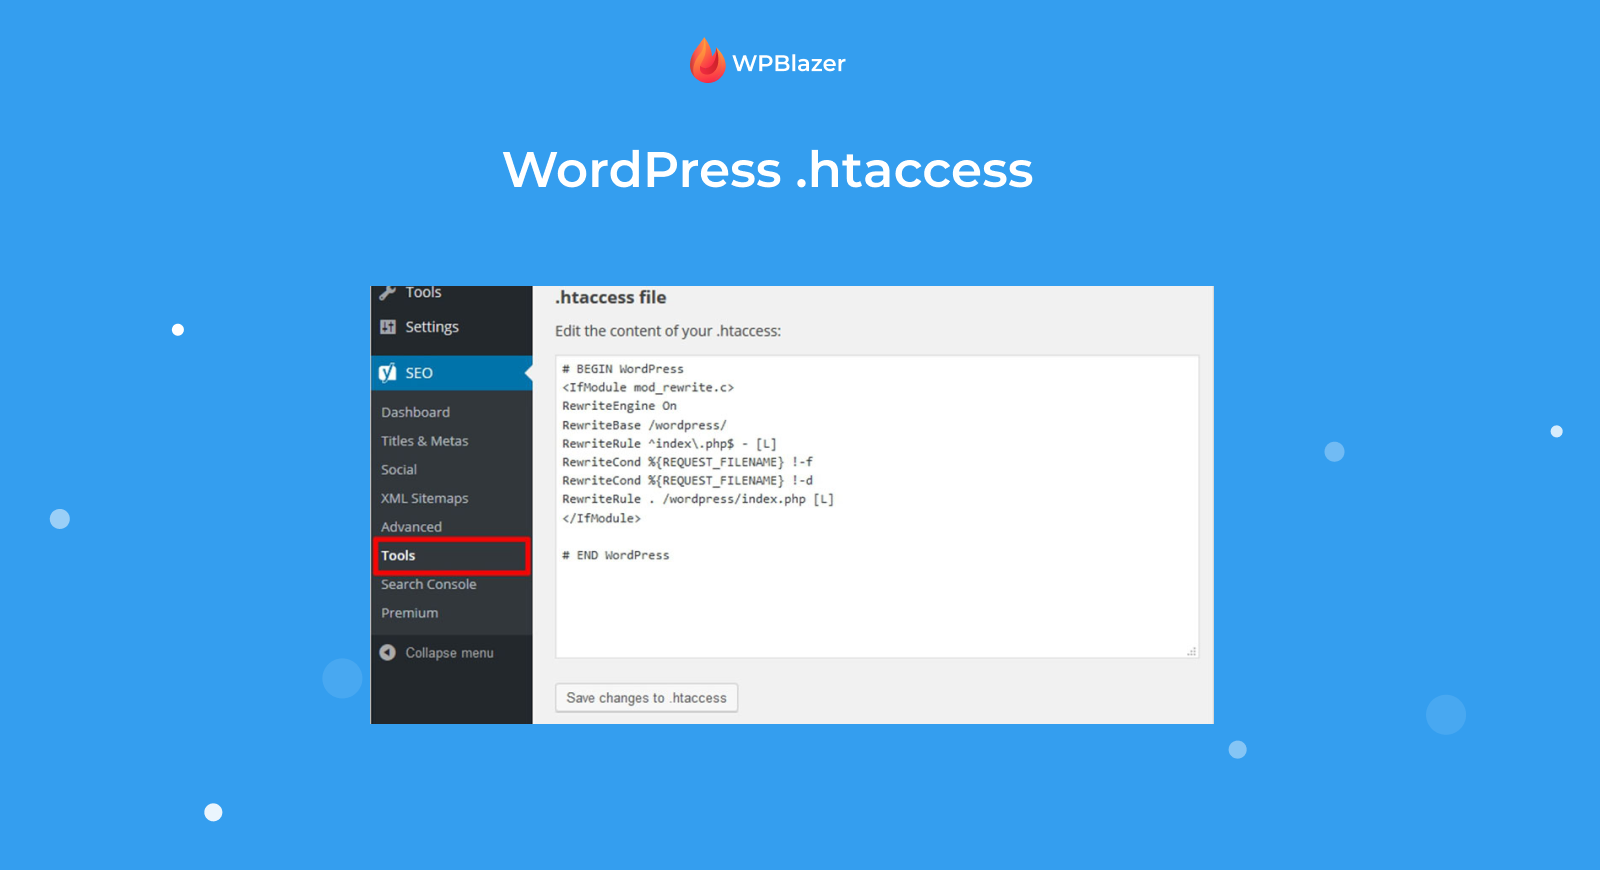
4. How to Edit Your WordPress .htaccess File
Using cPanel
Using an FTP Client
Using a Plugin
5. What Changes Can You Make with Your .htaccess File?
6. Optimize WordPress Speed Using .htaccess
1. What is the WordPress .htaccess File?
For WP users, the .htaccess file offers a world of benefits.
The WordPress .htaccess file will allow you to make changes to how WordPress works without having to make changes to your core files. This can be especially effective if you’re using a WordPress theme that hasn’t been designed specifically for you. Using a WordPress .htaccess file will allow you to manipulate the theme to suit your needs.
2. Where is the WordPress .htaccess File Located?
Are you having trouble finding your WordPress .htaccess file?
There could be a few reasons for this. Sometimes, you may not have a file at all. Or it could be that your FTP client software is hiding it from you.
Typically, your WordPress .htaccess file will be located in the root of your domain, but it can be in any directory at all. For example, if you use an FTP client to access your core WordPress files, they often hide any folder or file preceded by a period—like your .htaccess file—by default.
Find Hidden WordPress .htaccess Files
To check or change this setting, you’ll need to adjust the software options and preferences. I use WinSPC so that the following screenshot will be from there, but the process should be similar regardless of your software of choice.
Go to Options > Preferences (Or something similar, depending on your FTP client software)
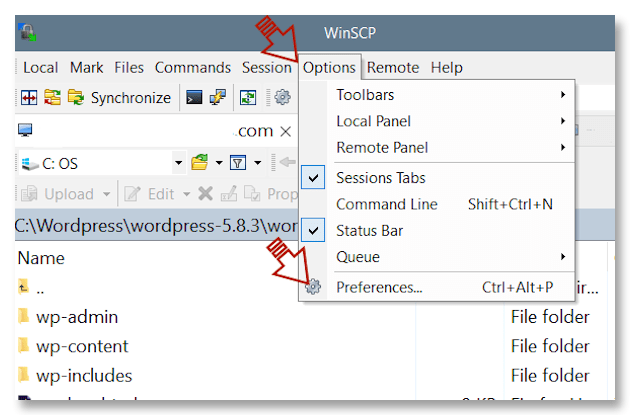
Next, go to Panels and click the box for Show Hidden Files.

Now your WordPress .htaccess files are visible.
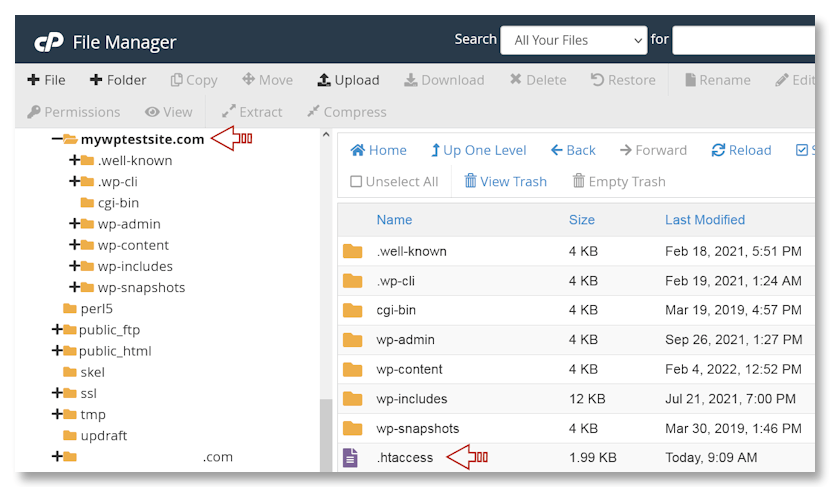
Find Your .htaccess File Via Your Host’s File Manager
You can also find your .htaccess File via your web host’s File Manager.
Log into your host’s cPanel—or whatever panel they use.

Choose File Manager and log into your server.
Depending on your site setup, you may find your WordPress .htaccess in the root of your site, or you may find it under your domain. In my example below, I have multiple sites on my domain and like to have a WordPress .htaccess file for each location.
Access your domain, which may be at the root level or within your public_html directory.
3. How to Create a .htaccess File
If you can’t find a WordPress .htaccess file, there’s also the chance you don’t have one at all. Sometimes, because of restrictions to permissions, WordPress may not be able to create one.
So if you’ve made sure you have no hidden files and still can’t see one, you can create a default .htaccess.
The following steps will first confirm your issue is with permissions and then create your WordPress .htaccess file.
Check Permissions
1. From your WordPress dashboard, go to Settings >Permalinks.
2. When you’re on the Permalinks page, scroll down to the bottom and click the Save Changes button—without making any changes beforehand.
3. At this point, WordPress will attempt to generate an .htaccess file. If you don’t have the proper permissions, an error stating “.htaccess file is not writeable” will appear.
Create a WordPress .htaccess File
1. Log into your host’s cPanel or equivalent and navigate to your File Manager.
2. In the lefthand sidebar menu, click on the public_html folder.
3. Once you’re in the public_html folder, create a new file by choosing the +File button in the top left of the main menu.

4. In the New File Name field type .htaccess, and then click the Create New File button.
5. Scroll through the files in your public_html folder until you find the .htaccess file you just created, and then right-click and choose Edit.
6. Add the following to the file to create a basic WordPress .htaccess file.
# BEGIN WordPress

RewriteEngine On
RewriteRule .* - [E=HTTP_AUTHORIZATION:%{HTTP:Authorization}]
RewriteBase /
RewriteRule ^index\.php$ - [L]
RewriteCond %{REQUEST_FILENAME} !-f
RewriteCond %{REQUEST_FILENAME} !-d
RewriteRule . /index.php [L]

# END WordPress
7. Save and close the file.
Your WordPress install now has an .htaccess file. But what if you want to edit it in the future?
4. How to Edit Your WordPress .htaccess File
There are multiple reasons to edit your .htaccess file. Here are a few things you can use your .htaccess file to do, to name a few.
- Block individual IP addresses or a range of IP addresses, such as an entire country
- Restrict access to specific files on your site
- Launch custom error pages
- Tighten security against malware and other issues
- Optimize your site for speed
Before editing your WordPress .htacess file—or any WordPress file—it’s important to make a backup of the file. Backups only take a second but they can save you from hours or days of aggravation if something goes wrong.
How to Edit Your WP .htaccess Using cPanel
1. Log into your host’s cPanel and navigate to your File Manager.
2. Navigate to your public_html file and then right-click on it and choose edit.

3. Make your edits and then save and close.
How to Edit Your WP .htaccess Using an FTP Client
There are many free FTP clients to choose from, including:
- FileZilla
- WinSPC
- Classic FTP
I use WinSPC so the following examples a created in it.
1. Log into your server using the FTP login information provided by your host.
2. Find your .htaccess file and right-click it to edit.
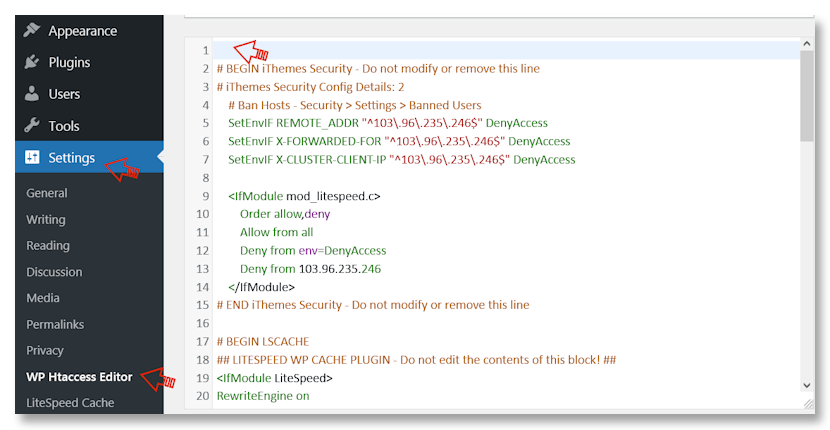
How to Edit Your WP .htaccess Using a Plugin
Depending on your comfort level when it comes to finding and editing WordPress core files, you might prefer to use a plugin to make changes to your .htaccess file.
One option is the WP Htacess File Editor. It provides you with a fast and easy way to edit, fix, and test WordPress features.

This plugin provides the following features:
- .htaccess syntax testing
- Automatic backups of your WP. Htaccess file
Here are the steps to download, install, and use the WP Htaccess File Editor.
1. Log into your WordPress dashboard.
2. Find and install the plugin via the Add New Plugin button.
3. Navigate to Settings > WP Htaccess Editor
4. Insert your cursor in line 1 and add a new blank line. From there, you can add new snippets and rules.
Now that you know how to find your .htaccess file, how to create a new one if necessary, and how to make edits to it. But what edits can you make?
5. What Changes Can You Make with Your .htaccess File?
One very common use of the WordPress .htaccess file is to set up redirects.
I’m sure all of us have stumbled across a 404 Page not Found error before. And they’re especially annoying when it’s a help or support topic that has been moved without redirecting a user to the new location.
If you’re doing a cleanup of any sort on your site and consolidating or moving pages, think of your users and URLs they may be following.
Another common redirect is from one domain name to another. Perhaps you have the domain for your.comany.com and yourcompany.com and you want the first to redirect to the second. Or perhaps you’ve rebranded and have an entirely new domain name but don’t want to lose traffic that’s still going to your old site.
Remember to make a backup of your WordPress .htaccess file before making any changes!
How to Redirect a Single WordPress Post of Page
Simply add the following to the top or bottom of your .htaccess file. Be sure to change the generic info to your URLs and domain.
Redirect 301 /old-page-or-post-url https://yourdomain.com/page-or-post-urlHow to Redirect Your Entire Site Using .htaccess
If you have an old or similar domain name you would like to point to a new domain, add the following to your WordPress .htaccess file. Be sure to replace yourolddomain and yournewdomain with your own domain info.
Note that this will redirect the domain whether it’s typed in with or without www.
RewriteEngine on
RewriteCond %{HTTP_HOST} ^yourolddomain.com [NC,OR]
RewriteCond %{HTTP_HOST} ^www.yourolddomain.com [NC]
RewriteRule ^(.*)$ https://yournewdomain.com/$1 [L,R=301,NC]
Forcing HTTPS .htaccess
If you install an SSL certificate on your WordPress site you need to force HTTPS. This additional step is necessary to ensure that your site starts to use the secure HTTPS URL instead of the insecure HTTP URL. This is done by adding the following to your .htaccess file.
SSLOptions +StrictRequire
SSLRequireSSL
SSLRequire %{HTTP_HOST} eq "www.WordPress.com"
ErrorDocument 403 https://www.WordPress.com
6. Optimize WordPress Speed Using .htaccess
If you pay any attention to SEO, you know site speed is an important ranking factor. If you have a site that loads slowly, Google won’t favor your site by placing it high in the Search Engine Results Pages (SERPs).
There are many SEO tools, but one way to speed up your site is with your WordPress .htaccess file.
Here are a few things you can do that will increase your site speed.
Enable Gzip and Deflate Compression
You’re probably familiar with zipped or gzipped files already. Zipping compresses a file to reduce its size. And not just for images or large documents you’re trying to share. It can also compress the coding that makes up your site.
Assuming your site is on an Apache server, copy and paste the following to the top of your .htaccess file, right before #BEGIN WordPress.
This will add gzip compression to your site.
<IfModule mod_deflate.c>
  # Compress HTML, CSS, JavaScript, Text, XML and fonts
  AddOutputFilterByType DEFLATE application/javascript
  AddOutputFilterByType DEFLATE application/rss+xml
  AddOutputFilterByType DEFLATE application/vnd.ms-fontobject
  AddOutputFilterByType DEFLATE application/x-font
  AddOutputFilterByType DEFLATE application/x-font-opentype
  AddOutputFilterByType DEFLATE application/x-font-otf
  AddOutputFilterByType DEFLATE application/x-font-truetype
  AddOutputFilterByType DEFLATE application/x-font-ttf
  AddOutputFilterByType DEFLATE application/x-javascript
  AddOutputFilterByType DEFLATE application/xhtml+xml
  AddOutputFilterByType DEFLATE application/xml
  AddOutputFilterByType DEFLATE font/opentype
  AddOutputFilterByType DEFLATE font/otf
  AddOutputFilterByType DEFLATE font/ttf
  AddOutputFilterByType DEFLATE image/svg+xml
  AddOutputFilterByType DEFLATE image/x-icon
  AddOutputFilterByType DEFLATE text/css
  AddOutputFilterByType DEFLATE text/html
  AddOutputFilterByType DEFLATE text/javascript
  AddOutputFilterByType DEFLATE text/plain
  AddOutputFilterByType DEFLATE text/xml
</IfModule>
Enable Browser Caching
If you’re not already using a caching plugin on your site, enabling caching using your WordPress .htaccess file can do it for you.
Caching will be stored for the length of time you set, so you can change the code below to suit your needs. Add the following two code snippets below to your .htacess file.
Expires Headers
#BEGIN EXPIRES HEADERS
<IfModule mod_expires.c>
# Enable expirations
ExpiresActive On
# Default expiration: 1 hour after request
ExpiresDefault "now plus 1 hour"
# CSS and JS expiration: 1 week after request
ExpiresByType text/css "now plus 1 week"
ExpiresByType application/javascript "now plus 1 week"
ExpiresByType application/x-javascript "now plus 1 week"
# Image files expiration: 1 month after request
ExpiresByType image/bmp "now plus 1 month"
ExpiresByType image/gif "now plus 1 month"
ExpiresByType image/jpeg "now plus 1 month"
ExpiresByType image/jp2 "now plus 1 month"
ExpiresByType image/pipeg "now plus 1 month"
ExpiresByType image/png "now plus 1 month"
ExpiresByType image/svg+xml "now plus 1 month"
ExpiresByType image/tiff "now plus 1 month"
ExpiresByType image/vnd.microsoft.icon "now plus 1 month"
ExpiresByType image/x-icon "now plus 1 month"
ExpiresByType image/ico "now plus 1 month"
ExpiresByType image/icon "now plus 1 month"
ExpiresByType text/ico "now plus 1 month"
ExpiresByType application/ico "now plus 1 month"
# Webfonts
ExpiresByType font/truetype "access plus 1 month"
ExpiresByType font/opentype "access plus 1 month"
ExpiresByType application/x-font-woff "access plus 1 month"
ExpiresByType image/svg+xml "access plus 1 month"
ExpiresByType application/vnd.ms-fontobject "access plus 1 month"
</IfModule>
#END EXPIRES HEADERS# BEGIN WordPress
Now add the following:
#BEGIN EXPIRES HEADERS
<IfModule mod_expires.c>
# Enable expirations
ExpiresActive On
# Default expiration: 1 hour after request
ExpiresDefault "now plus 1 hour"
# CSS and JS expiration: 1 week after request
ExpiresByType text/css "now plus 1 week"
ExpiresByType application/javascript "now plus 1 week"
ExpiresByType application/x-javascript "now plus 1 week"
# Image files expiration: 1 month after request
ExpiresByType image/bmp "now plus 1 month"
ExpiresByType image/gif "now plus 1 month"
ExpiresByType image/jpeg "now plus 1 month"
ExpiresByType image/jp2 "now plus 1 month"
ExpiresByType image/pipeg "now plus 1 month"
ExpiresByType image/png "now plus 1 month"
ExpiresByType image/svg+xml "now plus 1 month"
ExpiresByType image/tiff "now plus 1 month"
ExpiresByType image/vnd.microsoft.icon "now plus 1 month"
ExpiresByType image/x-icon "now plus 1 month"
ExpiresByType image/ico "now plus 1 month"
ExpiresByType image/icon "now plus 1 month"
ExpiresByType text/ico "now plus 1 month"
ExpiresByType application/ico "now plus 1 month"
# Webfonts
ExpiresByType font/truetype "access plus 1 month"
ExpiresByType font/opentype "access plus 1 month"
ExpiresByType application/x-font-woff "access plus 1 month"
ExpiresByType image/svg+xml "access plus 1 month"
ExpiresByType application/vnd.ms-fontobject "access plus 1 month"
</IfModule>
#END EXPIRES HEADERS# BEGIN WordPress
Cache-Control
# BEGIN Cache-Control Headers
<ifModule mod_headers.c>
 <filesMatch "\.(ico|jpe?g|png|gif|swf)$">
 Header set Cache-Control "max-age=2592000, public"
 </filesMatch>
 <filesMatch "\.(css)$">
 Header set Cache-Control "max-age=604800, public"
 </filesMatch>
 <filesMatch "\.(js)$">
 Header set Cache-Control "max-age=216000, private"
 </filesMatch>
 <filesMatch "\.(x?html?|php)$">
 Header set Cache-Control "max-age=600, private, must-revalidate"
 </filesMatch>
</ifModule>
# END Cache-Control Headers
Adding the above codes to your WordPress .htaccess file will speed up the time it takes for your website to load and may help with your SEO.
Conclusion
Understanding and utilizing the power of your WordPress .htaccess file can bring many benefits to your site.
Of course, other valuable WordPress management tools can save you time and effort. Check out WPBlazer if you would like to cut back on the amount of time you spend on WordPress admin.