

GitHub is one of the most popular tools among developers. If you haven’t done so yet, as a WordPress developer, it’s time you added it to your workflow. As you’ll see, whether you’re developing WordPress websites, themes, or plugins, a WordPress GitHub mix will make your life easier.
In this guide, we’ll explore two different ways you can use WordPress with GitHub. We’ll look at the available WordPress GitHub tools and how to work with a local and a cloud environment.
Then, we’ll take a quick look at how you can install WordPress plugins and themes that you find on GitHub. Lastly, we’ll also take a quick look at some of the WordPress GitHub plugins. So, without further ado, let’s get to it!
Table of Contents:
1. What Is GitHub?
2. Why Use WordPress with GitHub
3. Preparing GitHub for Your WordPress Work
4. Download and Install GitHub Client onto Your Computer
5. Installing WordPress on Your Local Machine
6. Wordpress Github: An Important Note About Version Control
7. Wordpress Github: Committing Your WordPress Files to GitHub
8. Downloading and Installing WordPress Plugins and Themes From GitHub (the Simplest Way)
9. Best WordPress GitHub Plugins
VersionPress
WP Pusher
GitHub Embed
10. Time to Get Your First Repo Up and Running!
What Is GitHub?
Before we talk about GitHub, we need to first look at Git itself. Whenever developers are working on a website or an app, they make constant changes to the code. But, it wouldn’t be safe nor reliable to have them work on the code in production. Nor would it make sense to have all developers edit the same code simultaneously.
That doesn’t mean they shouldn’t collaborate. But, whenever they’re working on a project, it’s best to branch out and work on their own copy of the source code.
Git is a distributed version control system that they can use to track and manage those changes to the code. GitHub is a place to host your Git repo, collaborate and share your code with other developers.
Why Use WordPress with GitHub
There are a few significant benefits to using WordPress GitHub. The first and most obvious one is the aforementioned version control. It allows you to experiment with your code, test it, and work on improving it. All that without the fear of making an irreparable error. After all, a WordPress GitHub mix enables you to get back to an earlier version of a selected file with ease.
Another huge reason to introduce GitHub to your WordPress Development arsenal is collaboration. By using Wordpress GitHub, you can allow others to join the development process and commit their code. And, as a result, speed up the development process. This is especially useful when working on a new plugin or theme.
Speaking of the latter, a WordPress GitHub combination is an excellent tool to keep a child theme in version control. What's important, it won't be just your edits that you'll be able to control. Such a mix protects you from sudden theme changes should it get an upgrade from the developer. Not to mention all the collaboration possibilities.
Preparing GitHub for Your WordPress Work
First, you need to create two GitHub repositories. We want one over on GitHub and one on your local machine. It’ll be the same repo – so technically, you just need to create one and then clone it. Since it’s a complete WordPress GitHub guide, let’s start with signing up on GitHub. First, enter your email address:

Then, GitHub will ask you to provide your password and choose a username. A quick note here. The username that you choose will be public. It’ll also be part of the links to your repos, where you store all your WordPress GitHub project files.
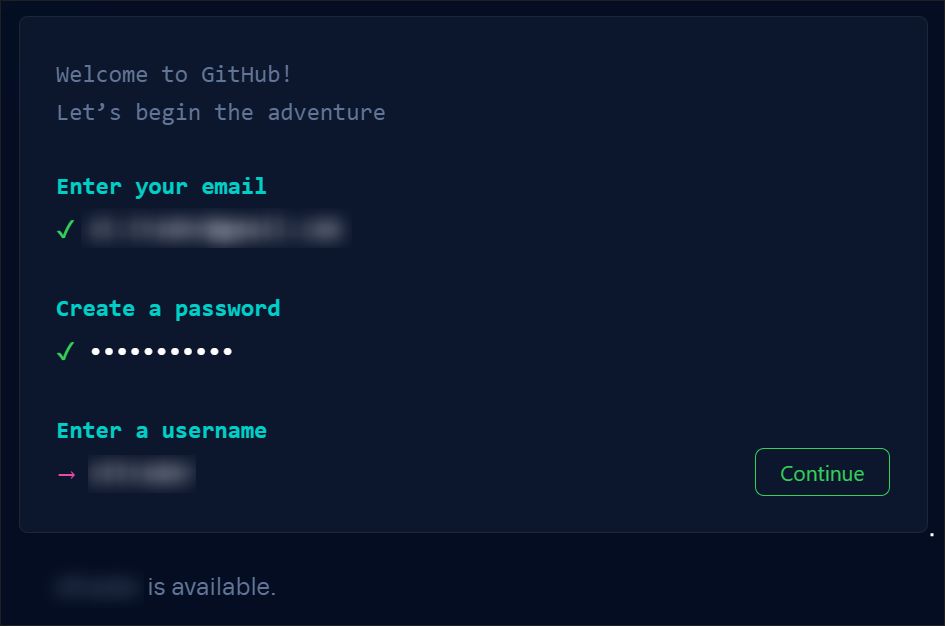
Once you hit continue, you’ll be asked to solve a captcha and pick whether you want to receive product updates. Then, just verify your email and you’re all set.
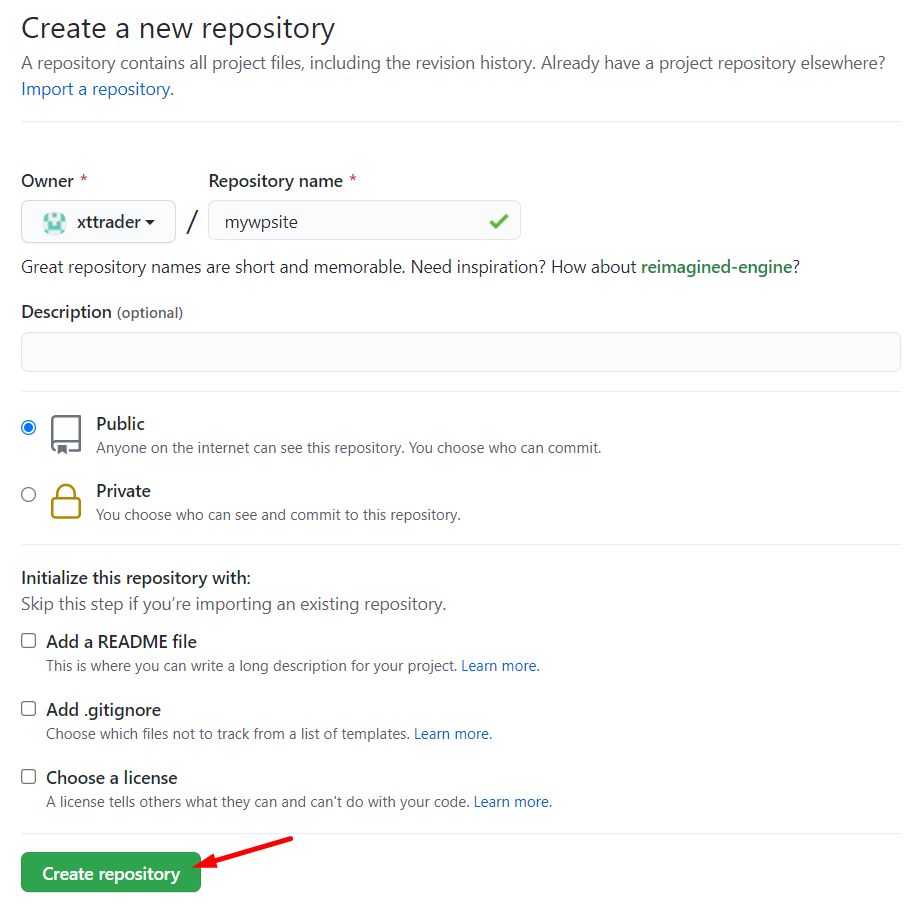
Next, let’s create your first repository:

Then, enter a new name for the repository and click Create repository. Keep in mind that, just like your username, the repository name will be public.
Download and Install GitHub Client onto Your Computer
There are two ways you can install and configure GitHub in a local environment. You can either do everything using a command-line tool or a GitHub desktop client. In this guide, we’ll download the GitHub Desktop client. To do that, head over to this page.
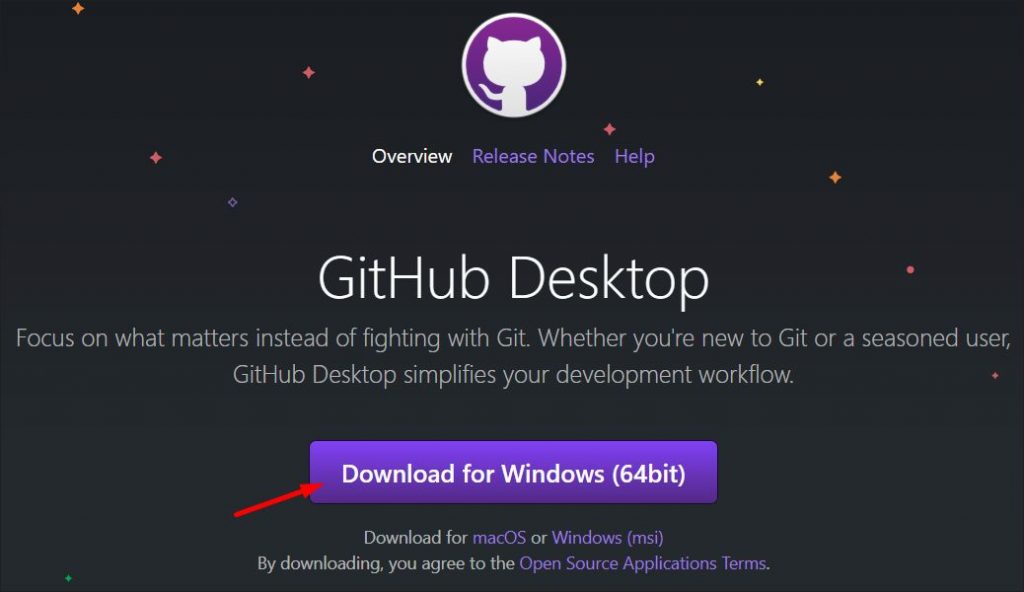
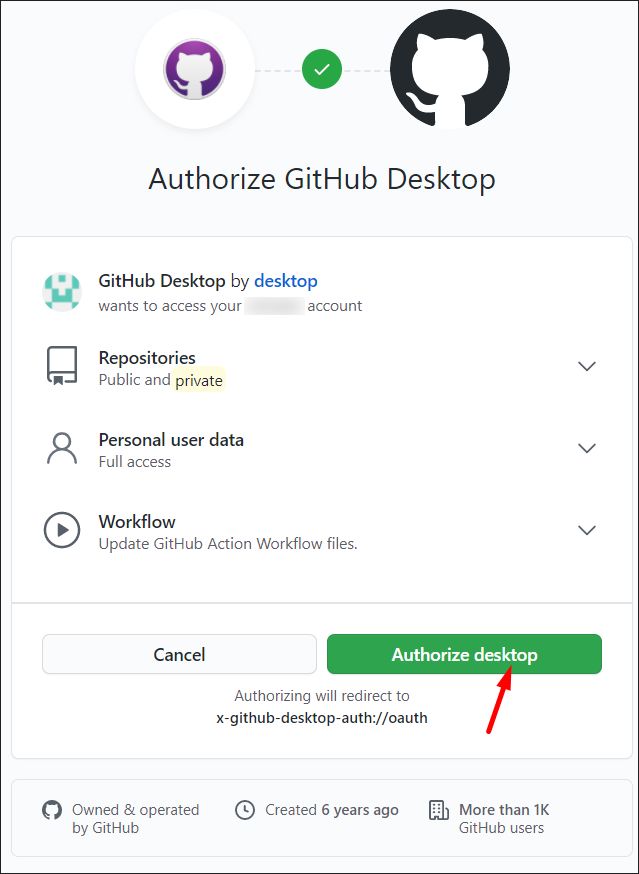
Note that we’ll be using a Windows version – but both macOS and Linux versions are available. Once you download the file, start the app. You'll be asked to sign in to the account you created in the previous step and authorize GitHub desktop:
Next, you want to clone a repository from the Internet over to your hard drive. A quick reminder: if you haven’t created a clean repo on GitHub yet, you can create one locally and publish it online.
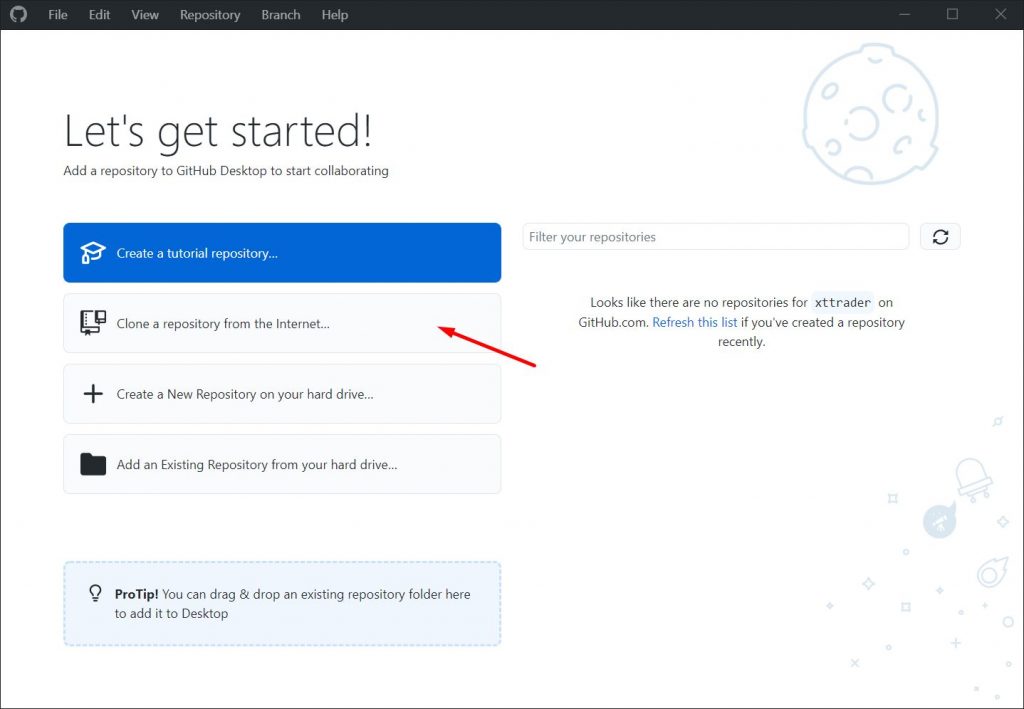
In our case, however, we’re cloning a repository that’s already published on GitHub’s server. To do that, hit Clone a repository from the Internet. In the next window, choose GitHub.com and select the repository that you wish to clone.

Wordpress GitHub: Installing WordPress on Your Local Machine
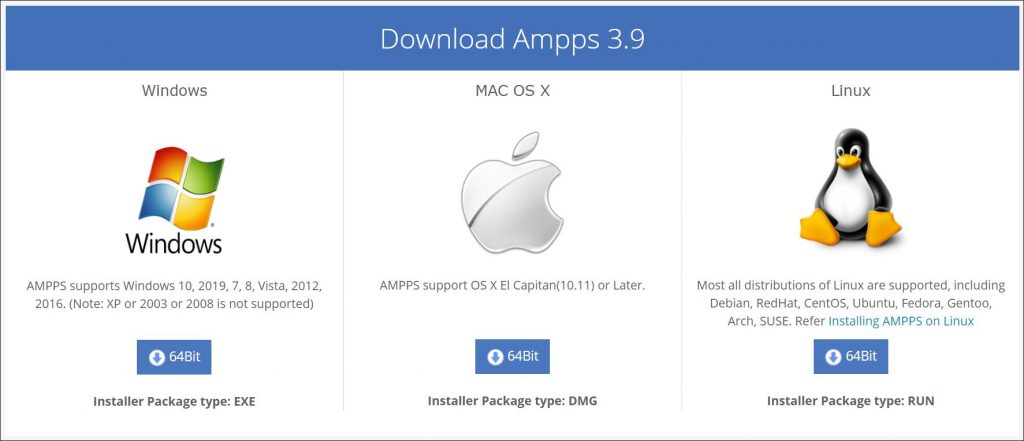
Of course, you also need to install WordPress on your local computer. To do that, you want to create a local server. There are a couple tools you can use to do that such as MAMP, WampServer, or Docker. There are also WordPress-centric solutions such as Local. In this guide, we’re going to use the Windows’ version of ampps. Head over to this page to download the latest version.
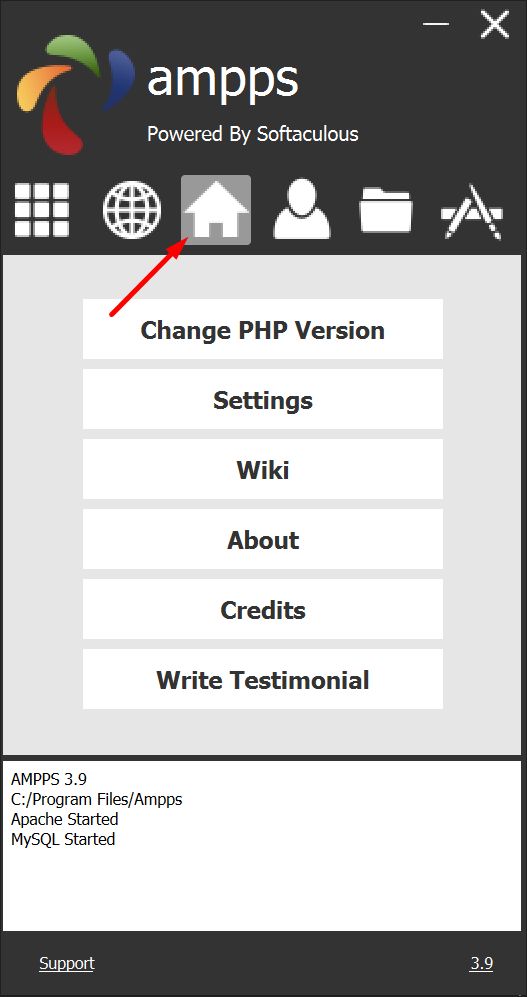
Once you download, install the software and restart your computer if needed. The installation process is very straightforward so we’ll not go into details. Next, open ampps – both MySQL and Apache should already be up and running. Click Home to go to the control panel:
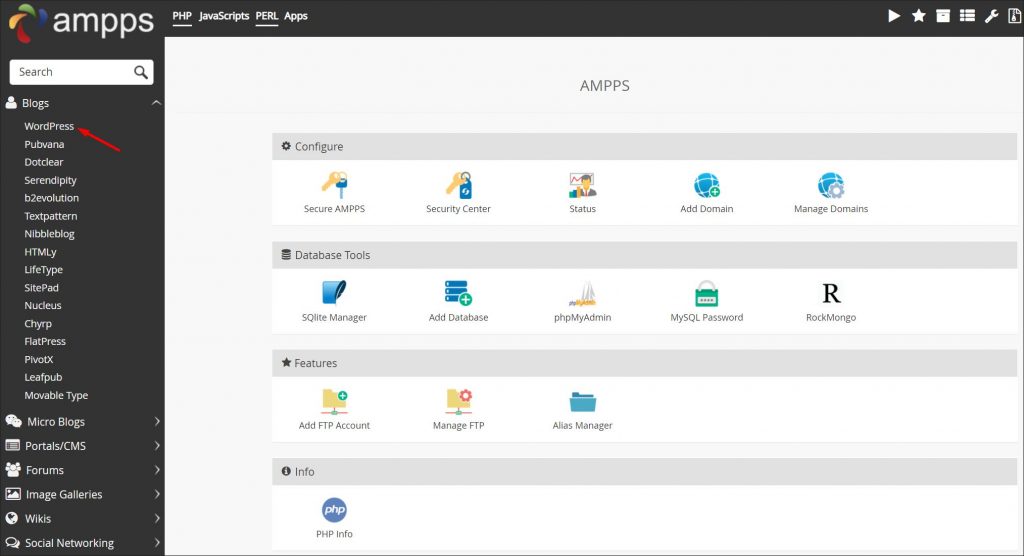
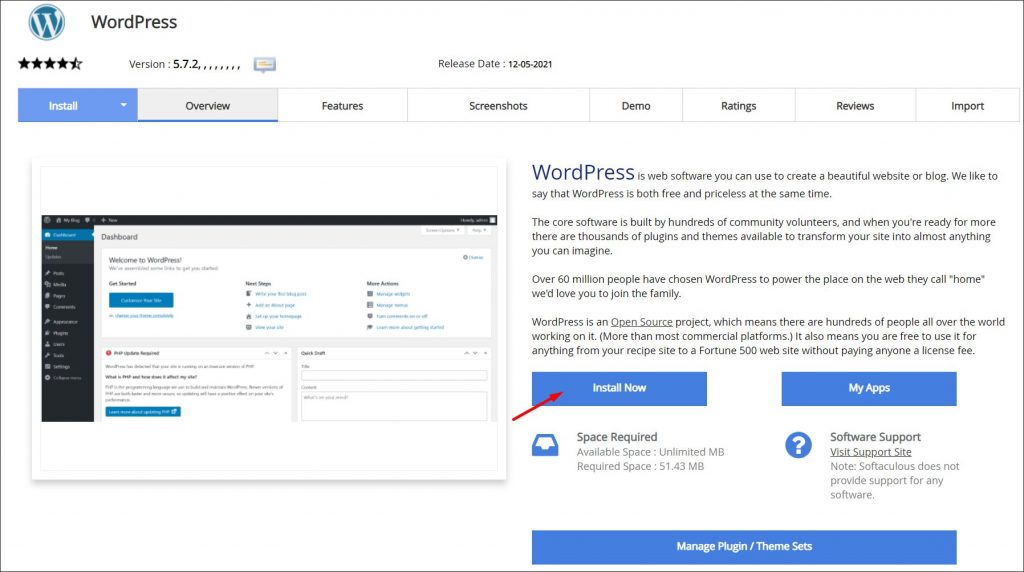
Once you enter the control panel, click Blogs in the left-hand side menu and select WordPress:
Next, click Install Now to begin installation:
Because you’re installing it on a local server, you can’t choose the domain. But, you can still choose other options such as site name or admin credentials. Of course, you are free to change these later on. Once you set everything, scroll to the very bottom and hit Install.
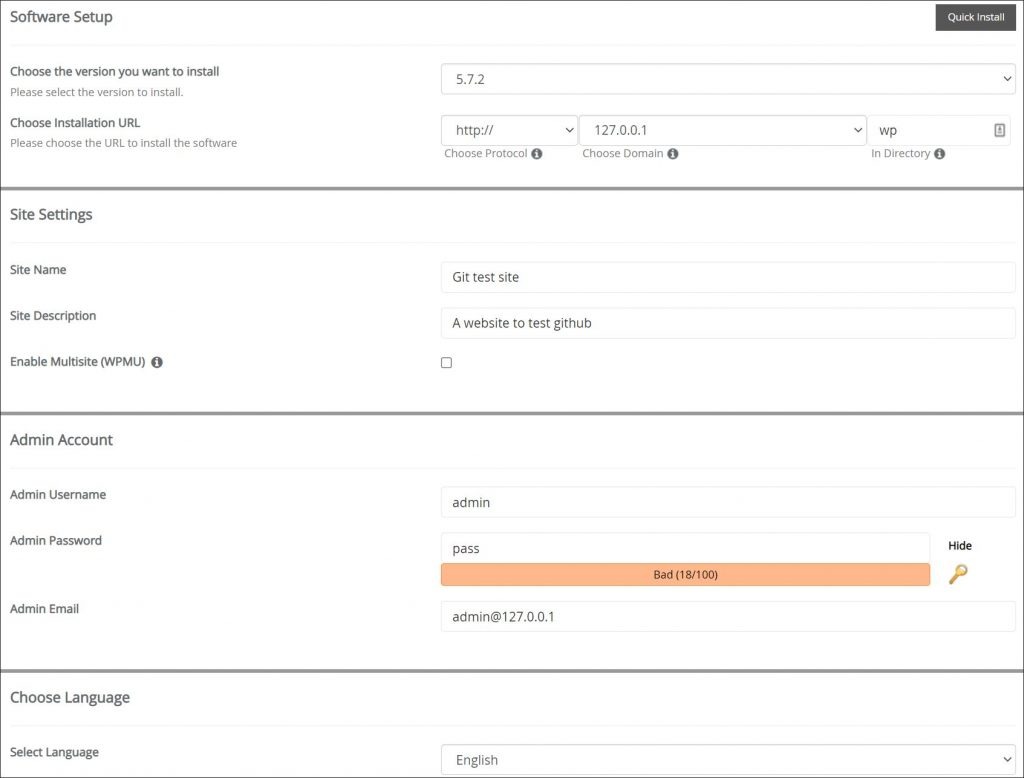
After installation finishes, you’ll get the exact link to your admin panel. In our case, it’s http://127.0.0.1/wp/wp-admin/. Unless you’ve changed the WordPress installation path, the files themselves will be in the ampps folder. The default for it is C:\Program Files\Ampps\www\wp. Now, we can go back to the GitHub Desktop app which we installed a few moments ago.
Wordpress GitHub: An Important Note About Version Control
GitHub is an excellent tool to work on your WordPress theme or plugins. However, it’s not an ideal solution for working with the entire site. This is because WordPress is already under version control. As a result, there are certain files, like WordPress core files that you shouldn’t put in your repository. It’s also a reason why we don’t recommend installing WordPress in your GitHub’s repo folder (even if it’s possible).
What if you still want to keep your whole WordPress GitHub project under version control? At the very least, you may want to exclude the following files:
- Wp-config.php
- Wp-content/uploads (more on that below)
- Wp-content/backup (a rather self-explanatory reason)
- Wp-content/cache/ (same as above)
- Sitemap
To do that, simply include those files in the .gitignore file.
And what about the wp-content/uploads folder? One of the main reasons for that is the way WordPress handles images. Whenever someone uploads an image, WordPress immediately creates its multiple versions. Keeping the uploads folder in your repo means anyone who clones it, has to download all those files with it.
Because we don't recommend using you upload the entire site to GitHub repo, we don't go more in-depth into it. However, if you still want to do that, check out this great guide by Cloudways.
Similarly, you shouldn’t treat GitHub as a backup tool. Sure, when you think about GitHub, it might be tempting to store your entire WP installation there. But, keep in mind that site backup is not just about core website files.
On top of WP core files, a full WP site backup includes the database, as well as all media files. This makes the idea of backing it up to GitHub repo troublesome. Technically, you could send both media and data to Git. But, a better idea would be to use dedicated WordPress backup tool. For example, WP Blazer’s backup feature allows you to create a secure clone of your site with all its files and settings in just a few clicks.
Committing Your WordPress Files to GitHub
So, you’ve got your WordPress local installation ready for testing. You’ve introduced some changes to the website and theme. Now, you want to commit those theme changes to the GitHub repository. How to do that?
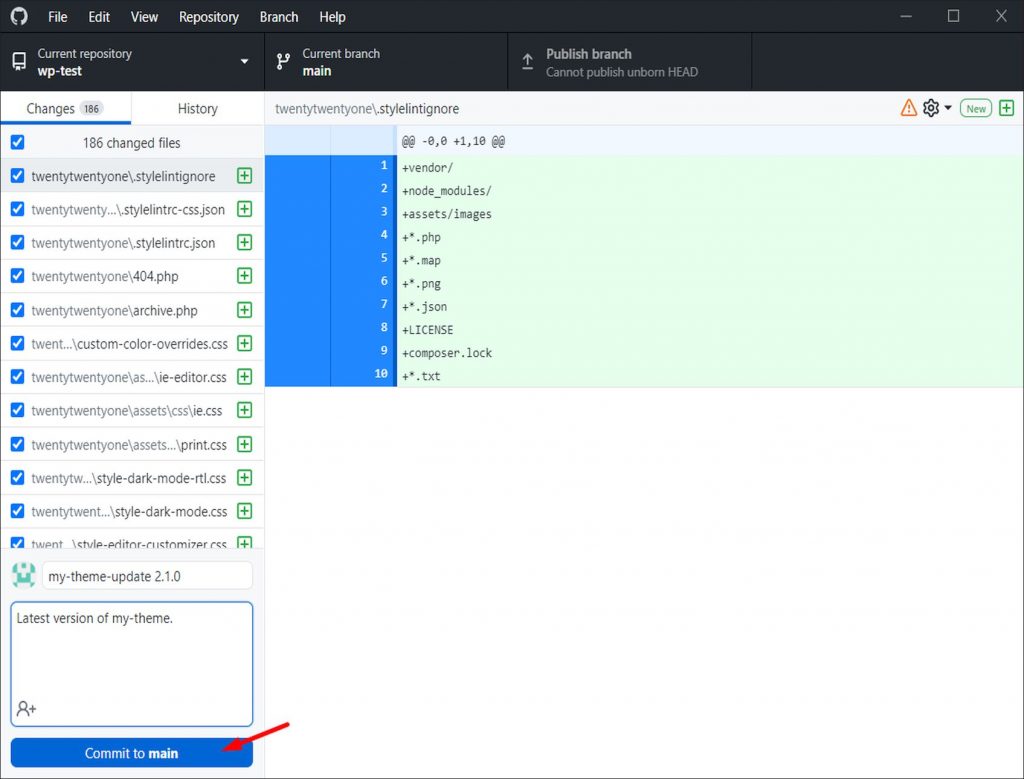
The easiest way to do that is to copy the files straight to your Git repository folder. If you used the default GitHub Desktop settings, it's at Documents\GitHub\your-github-repo. Once you update the files in the repository folder, it’s time to push them.
To do that, open the GitHub Desktop app and select the repository you want to commit the work to. Next, add a summary and a brief description of the changes and click Commit to main:
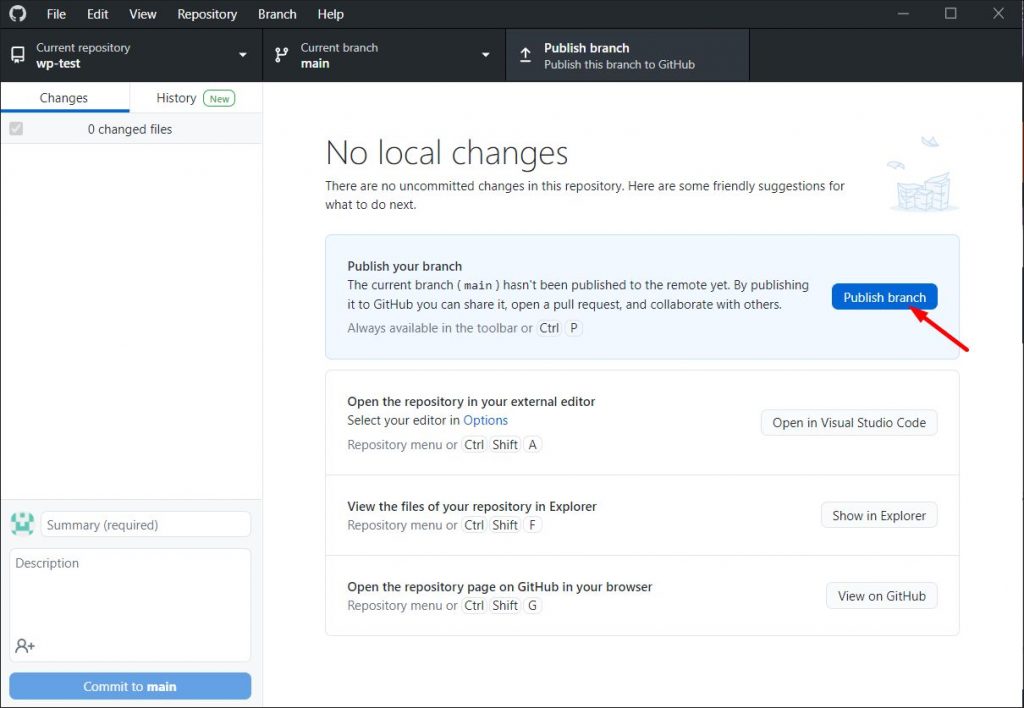
Because we haven’t published the files to the remote GitHub server yet, the next step is to publish the branch:
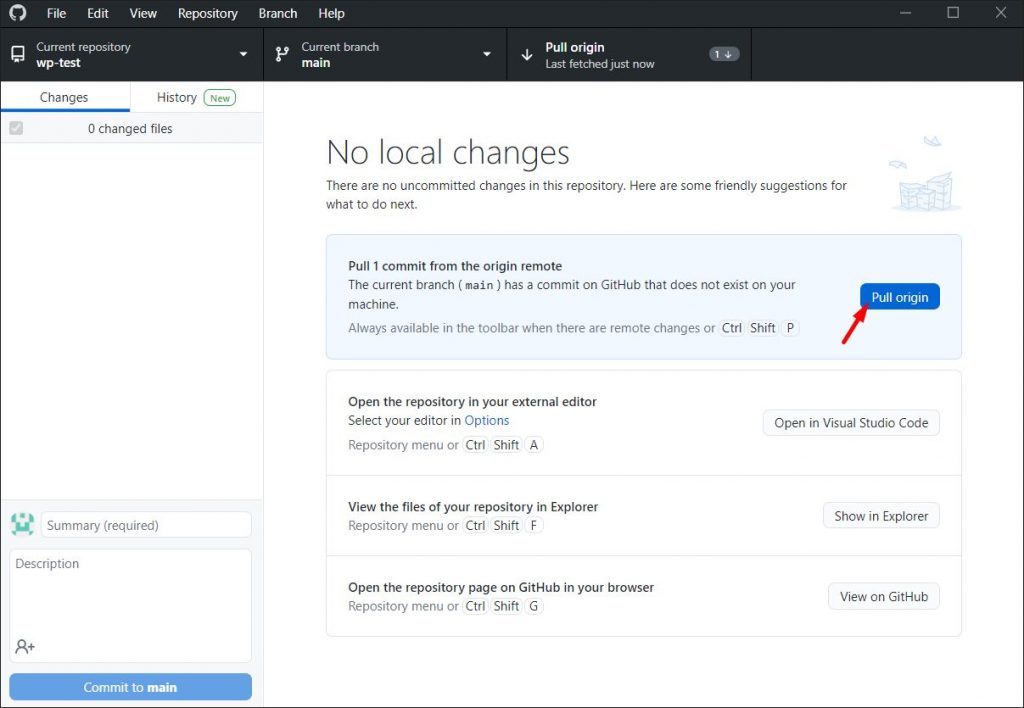
Now, what to do in case someone else has committed changes to the project and merged them on GitHub? In this case, hit Pull origin to merge the changes to your local repository:
And what if you want to stay isolated from the changes other people are making? All you need to do is create another branch in your repo.
Downloading and Installing WordPress Plugins and Themes From GitHub (the Simplest Way)
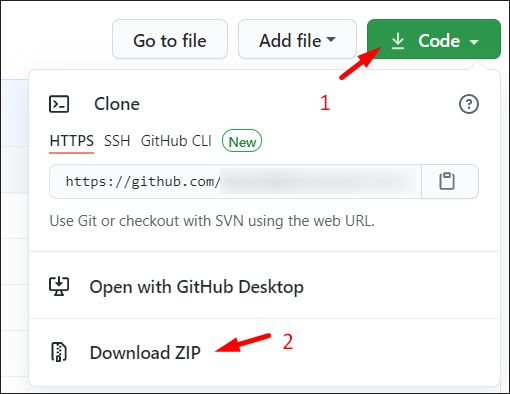
Of course, GitHub is also an excellent place to look for plugins and themes to install on your website. Thankfully, you can install them the same way you'd install any other plugin. Except, of course, those that you download straight from WordPress plugin repository. First, go to the selected plugin or theme GitHub repository. There, hover over the Code button and hit the Download ZIP that appears:
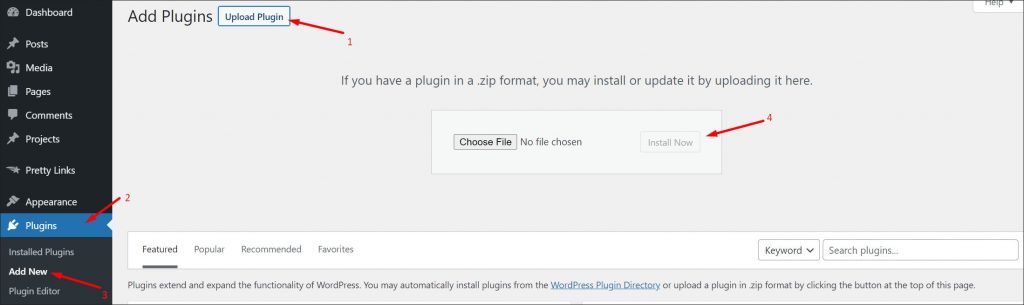
Next, follow the usual plugin installation steps. Go to your WordPress dashboard, select Plugins, click Add New and then click Upload Plugin. Then, choose the zip file and click Install Now. Once the plugin is installed, you’re free to activate it.
Of course, the same process is true for themes. But, instead of going to the Plugins panel, you want to go to Appearance, then Themes. Once there, click Add New, and just like when uploading a plugin, select the .zip of the theme.
An important thing to keep in mind is that WordPress might not show updates for some plugins and themes downloaded from GitHub out of the box. This is because it pulls the info about the latest stable version from the plugin’s header.
If the right code is not there, you might have to update the plugins manually. Alternatively, you can use the updater plugin. We cover a few other plugins in the next section.
Best WordPress GitHub Plugins
If you’re still a beginner, a WordPress GitHub combination may seem complicated. Thankfully, WordPress boasts a few solid plugins that can help you automate part of your work. And, as a result, make it much easier and faster! Here are our top three picks to make your life easier:
VersionPress

Take your version control with WordPress and GitHub to the next level. Unlike most solutions VersionPress goes beyond just version-controlling the files. With the wordpress github plugin, it's possible to "take control" of the WordPress database too!
Most importantly, the plugin automatically creates git commits for all changes. Plus, it's easy enough to be used by both advanced and seasoned developers alike.
WP Pusher
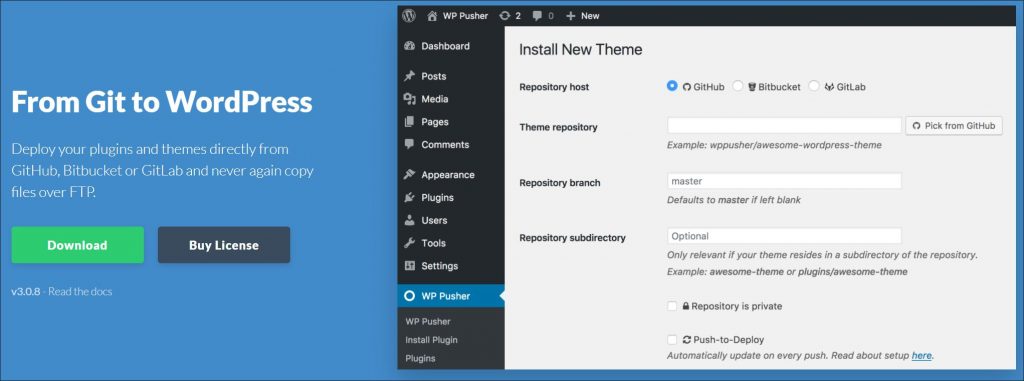
WP Pusher is a Premium WordPress GitHub plugin that allows you to deploy your plugin and theme files straight from a repository. All that is possible even without FTP access - and the plugin works with GitHub, Bitbucket, or GitLab.
You can even set it to automatically update the theme or plugin any time you push the code to Git. The only drawback? Its free version supports only public repositories. Luckily, the most basic license is just $99/year and allows you to use the plugin on up to 5 client sites.
GitHub Embed
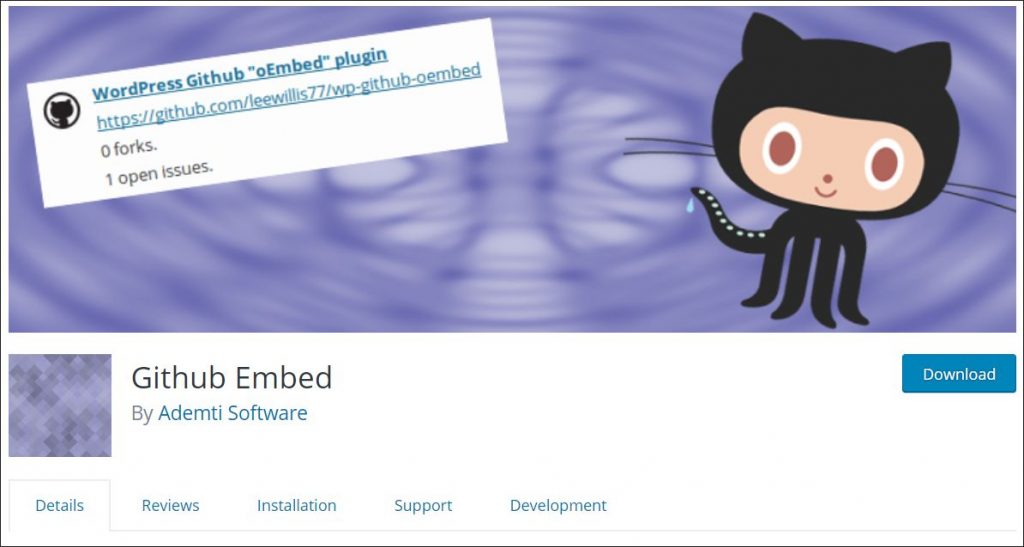
A neat little wordpress github plugin that you can use to easily share your GitHub details on a selected page or post. Use it to embed repositories, user profiles, project milestone summaries, or contributions. All you need to do is copy-paste the URL to where you want to embed it. You can find the plugin on GitHub here.
Time to Get Your First Repo Up and Running!
Now that you know how to use a WordPress GitHub mix, it’s time you started using it to your benefit! Adding GitHub to your WordPress developer’s toolbox comes with many benefits. But, most importantly, it gives you more control over the development process.
Experiment, share the code, and collaborate with other developers with ease! To take the first step and get the ball rolling, visit GitHub’s official website and create your first repository.
And, of course, don’t forget to create a free WP Blazer account and back up your website. When you first sign up, you’ll get a 14-day free trial with access to all the plugin's features. Manage themes, plugins, and keep an eye on the uptime of multiple sites - all that in one convenient dashboard!