
When people view your website, they usually want to know three things: where they are, where they have been, and where else they can go. By making these answers easy to find in your site's navigation, users are more likely to stay on your site longer, which increases the chances of a profitable deal.
Regarding making your business stand out, website navigation is essential. A clear and easy-to-use navigation system is like a road map that shows users how to get to every page and content on the website. It is the most important thing you can do to get people to stay on your site, read your material, and have a good experience, leading result in increased revenue and brand support for your business.
Table of Contents
1. What is the WordPress Navigation menu
2. Adding a WordPress Navigation menu
Step 2.1: Create a menu
Step 2.2: Assigning the menu to the location
3. Adding a WordPress Navigation menu
Step 3.1: Adding a new navigation Menu item
Step 3.2: Customize a Navigation menu item
Step 3.3: Rearranging Navigation menu items
Step 3.4: Remove a Navigation menu item
4. Creating a Drop-Down Sub-menu
5. How to include Custom Links in a navigation menu
6. How to edit Menu Items using a live preview
7. Conclusion
1. What is the WordPress Navigation Menu
A website's navigation menu is a set of text links that serve as a guide to the various parts of the site. On a WordPress site, they are generally shown as a horizontal bar of links at the top of each page.
Navigation bars help people find what they are looking for on your site and give it an order. Here's how the menu to get around on WPBlazer looks:

It's very easy to add menus and sub-menus with WordPress. You can add links to your most important pages, groups, or topics, blog entries, and even custom links like your social media profile.
Your WordPress theme will determine where your menu goes. The majority of themes are going to offer several choices, so you can make distinct menus that might be displayed in different places.
For example, most WordPress themes have a main page that shows up at the top. Certain themes may also have an additional menu, a menu at the bottom, or a menu for mobile users.
2. Adding a WordPress Navigation Menu
Step 1: Create a Menu
It is essential to create a menu first. To do that,
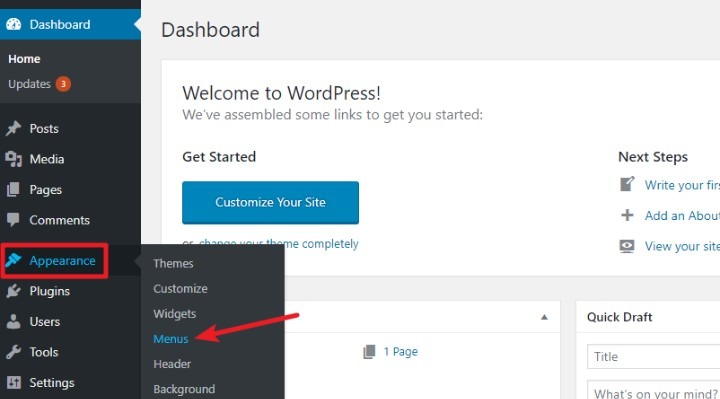
- Go to WordPress Dashboard,
- Appearances- Menu
You have to mention a menu name for your reference, the internet visitors will not look at it.
Once you give a name, click Create Menu.

You have created a menu.
Step 2: Assigning the menu to the location
Now, you have created your menu. There will be an option called Menu Settings. In this step, you have to be clear about the Display Location option
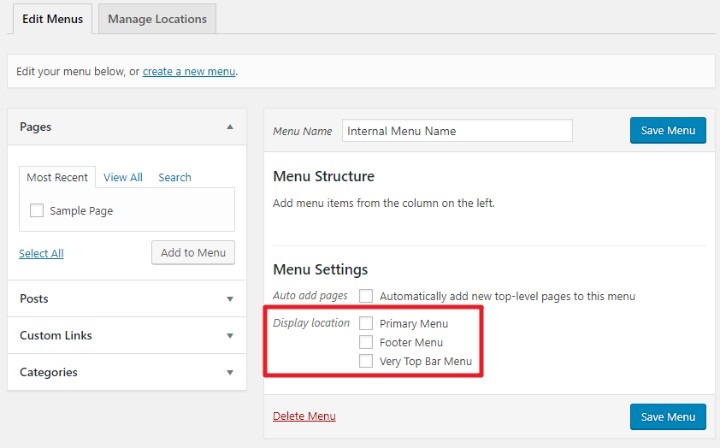
This information will help WordPress helping it on knowing the place of insertion of the navigation menu in your live website.
However, these location names differ for different themes and are not the same. Therefore, the correct location of the interface can differ from the locations in the image.
So, a doubt arises? Which location can be chosen?
If you have a standard navigation menu design in mind, then you can use the word, Primary. It looks like,
- Primary
- Primary Menu
- Primary Navigation Menu
However, sometimes the word Primary might not be available. In that case, you can look out for
- Main
- Top
- Header
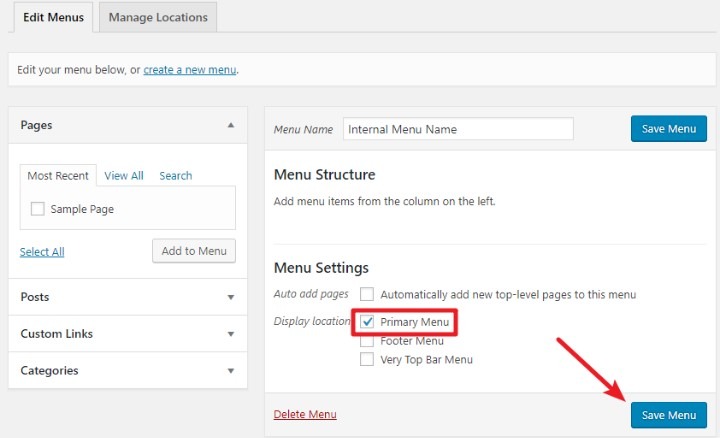
Now, you have found the menu location right. After that, check the box (with the location) and click on Save Menu.
3. Adding a WordPress Navigation menu
Step 3.1 Adding a new Navigation menu item
You can use the sidebar on the left to add a Navigation Menu item.
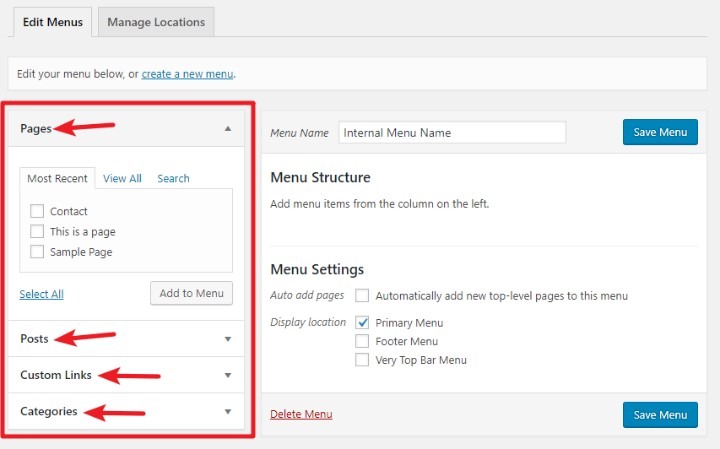
There are different sections for menu items like pages, posts, etc.
- Pages- In this menu item, you can add links to your published pages.
- Posts- In this menu item, you can add links to your published posts.
- Custom Links- In this menu item, you can add custom links, be it internal or external links.
- Categories- In this menu item, you can add links to different categories on your blog.
Depending on the theme and/or plugins you're using, you may also notice additional sections with menu items unique to your site.
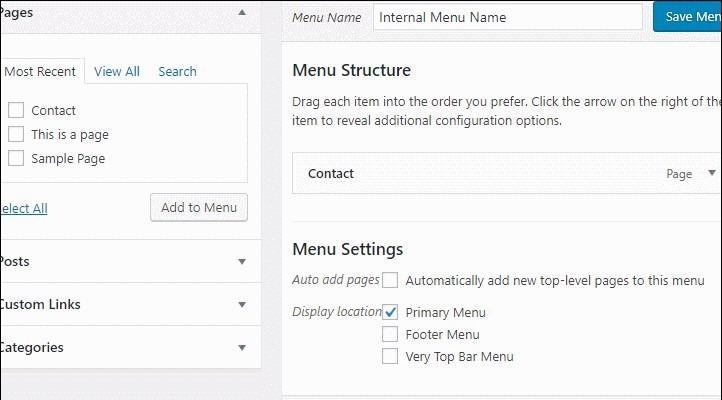
When you want to add a link to your contact page, you can:
- Select the Contact page checkbox
- Choose "Add to Menu"
On the right side of the interface, under Menu Structure, it ought to display once you click Add to Menu:

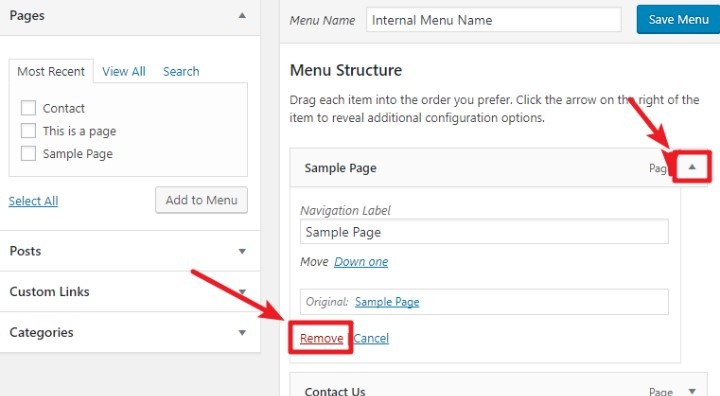
Step 3.2 Customize a Navigation Menu item
WordPress by default displays the text for the navigation menu using the title of a post, page, or category.
If you wish to alter this, just click the Down Arrow symbol next to any menu item and edit the text:
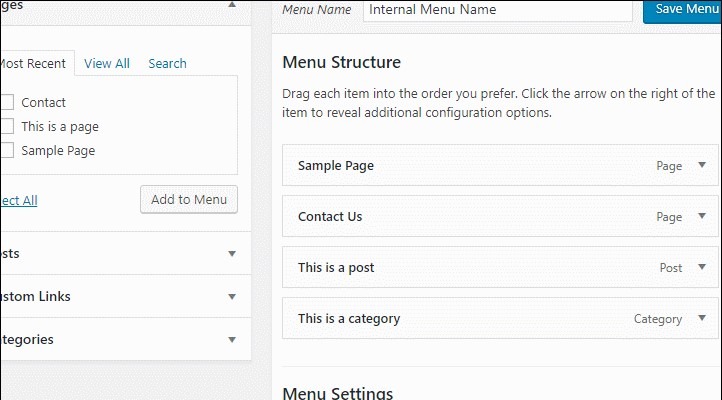
Step 3.3 Rearranging Navigation Menu items
You may need to change the menu items as you start adding more than one.
Simply drag & drop menu items into the correct order to change them:

Additionally, you may drag a menu item underneath another menu item to create a submenu:
Step 3.4: Remove a Navigation Menu item
To delete anything from your menu:
To the right of the item, choose the Down Arrow symbol.
Choose "Remove".
4. Creating a Drop-Down Sub-Menu
Adding a drop-down menu to WordPress is quite simple. Simply add new pages, posts, custom links, and other items to your menu and arrange them in the drop-down menu in the order you like. Hold down your mouse pointer on the items you want in a sub-menu and slide them slightly to the right, beneath the parent you want to include in the drop-down.
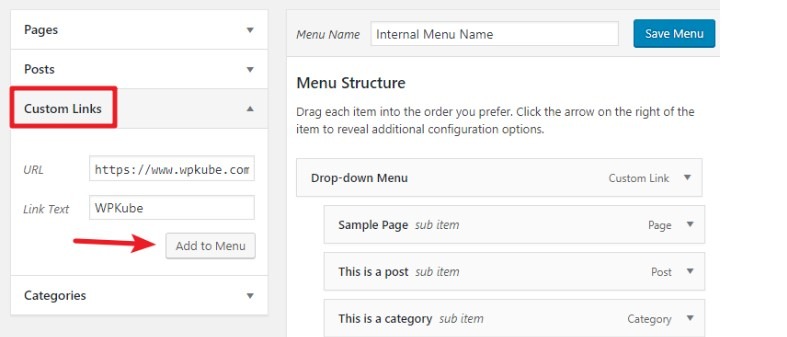
5. How to include custom links in a Navigation menu
Custom links are useful since they allow you to Quickly link to any area on your website, even if it isn't a standard WordPress post or page.
Add external links to other websites.
To create a customized link:
- Go to the Custom Links area on the left sidebar.
- Enter the URL that you wish the item to link to in the URL field.
- Enter the menu item text into the Link Text box.
- Click Add to Menu.
6. How to edit Menu items using a live preview
WordPress includes another feature that allows you to edit menus while seeing your changes in real-time.
While I don't think it's the simplest way to construct a new menu from scratch, it does allow you to see how your menu items will appear on your live site. This allows you to verify that your menu looks excellent and is simple for visitors to use.
To access it:
Go to Appearance > Customize.
Select the Menus option in the WordPress Customizer sidebar.
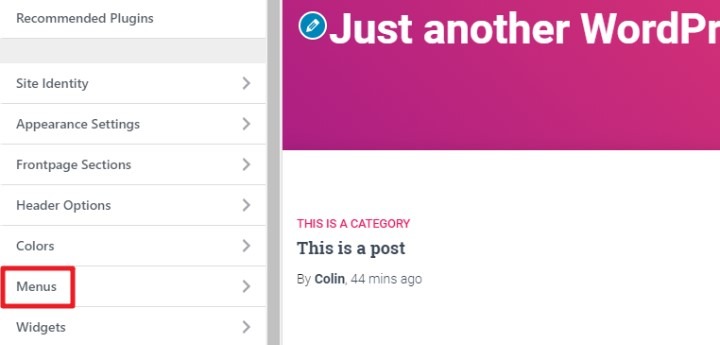
Select your menu (you should see the menu name you created.)
7. Conclusion
In conclusion, mastering WordPress navigation menus is fundamental for effective website organization and user navigation. This guide has equipped you with comprehensive steps to seamlessly incorporate and customize menus, enhancing user experience and site functionality. By understanding the menu system's intricacies, you're empowered to tailor navigation structures to fit your site's specific needs, whether for blogs, portfolios, or ecommerce platforms.
Remember to consider user preferences, accessibility, and responsive design principles throughout the process. With these skills, you're poised to create intuitive and user-friendly WordPress websites that engage and retain visitors effectively.