
There comes a time in every website owner’s life when they start thinking about cloning their site. And it’s no surprise. Having a clone of your website comes with many benefits. First, it makes testing easier and safer. Plus, it makes switching servers easy and gives you a template you can use to recreate similar sites.
Unfortunately, merely copy-pasting the files won’t cut it. There’s too much code and too many dependencies in that code that need to be updated for the site to work.
But who said you need to copy-paste anything? In this guide, you’ll see exactly how to clone a WordPress site. No coding skills required!
Table of Contents:
1. A Clone or a Backup?
2. Different Ways to Clone Your Website
Do It Manually
3. Use Built-In Server Options
4. Use a WordPress Plugin
Duplicator
UpdraftPlus
All-in-One WP Migration
WP Blazer
4. When Should You Consider Cloning Your Website?
Security
Speed of Operations
Experiments and Upgrades
5. Clone a Wordpress Site: 10 Simple Steps
Step 1. Identify Why You Want to Clone the Website
Step 2. Pick a Plugin
Step 3: Install and Activate Selected Plugin
Step4. Review Duplicator Website Package Settings
Step 5. Review Package Scan Results
Step 6. Download the Package to Your Computer
Step 7. Upload the Archive to the New Location
Step 8. Unpack Website Archive in the New Location
Step 9. Prepare and Install MySQL Database
Step 10. Check that Everything Is Working Correctly
A Clone or a Backup?
Many people believe cloning is the same to moving your website backup to a new location. In reality, a backup is just a collection of files that can be used to restore a site in case it crashes. But, it's not a clone of your site, and lacks some of its conveniences.
Compared to that, a clone is a fully functional website that can easily be moved to a new server. A WordPress cloning plugin can offer a few extra options that you won't find in a typical backup.
For example, some cloning plugins allow you to substitute URLs across the whole site in just a few clicks. This comes in handy should you want to change a domain during your website's migration.
Different Ways to Clone Your WordPress Website
Do It Manually
What’s first thing that come to mind when someone thinks about how to clone a WordPress site? Doing that manually! But, as mentioned earlier, you can’t just copy-paste the files from one server to another. Sure, in theory, all you need is a file manager like FileZilla and FTP access to your old and new server.
Unfortunately, it’s not as easy as it sounds. On top of moving the files, you also need to move (or recreate) the database. That's why, unless you’re familiar with WP's environment, , it’s better to try other ways of cloning your website.
Use Built-In Server Options
Some hosting companies, such as Cloudways, allow you to clone the site right in the dashboard.
Please note that the clone you create will still be hosted on their server. This means, it’ll only work if your goal is to use it as a staging environment. Which is actually exactly what they allow you to create.
But, if all you need is an environment where you can update and test your website – it’s a very convenient feature!

Use a WordPress Plugin
The fastest, easiest and most convenient way to clone your website is to use a WordPress plugin.
Thankfully, the WP repository offers plugins that’ll help you do just about anything. Obviously, the list of possibilities includes creating a clone of your website. Here are a few sample plugins you can try:
Duplicator
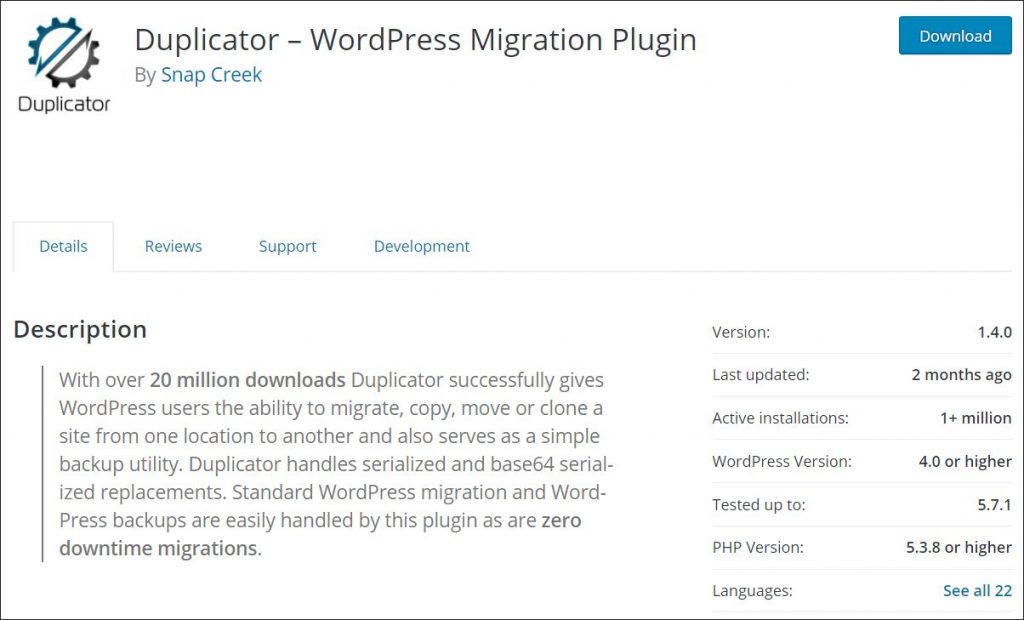
A popular WordPress migration plugin. Duplicator allows you to clone and move the site from one location to another.
You can use it to clone a site, create a backup, or even pull a live site to a local host for testing and development.
UpdraftPlus

The primary goal of UpdraftPlus is to help you create an automated backup of your website and send it to the cloud. However, the premium version of the plugin also allows you to clone your site. As a result, it’s quite often recommended for anyone looking to find out how to clone a WordPress site.
When it comes to storing your backup, the free version allows you to send the backup to Dropbox, Google Drive, FTP, S3, Rackspace, or Email. The premium one adds Microsoft OneDrive, Azure, Google Cloud, among other options.
All-in-One WP Migration
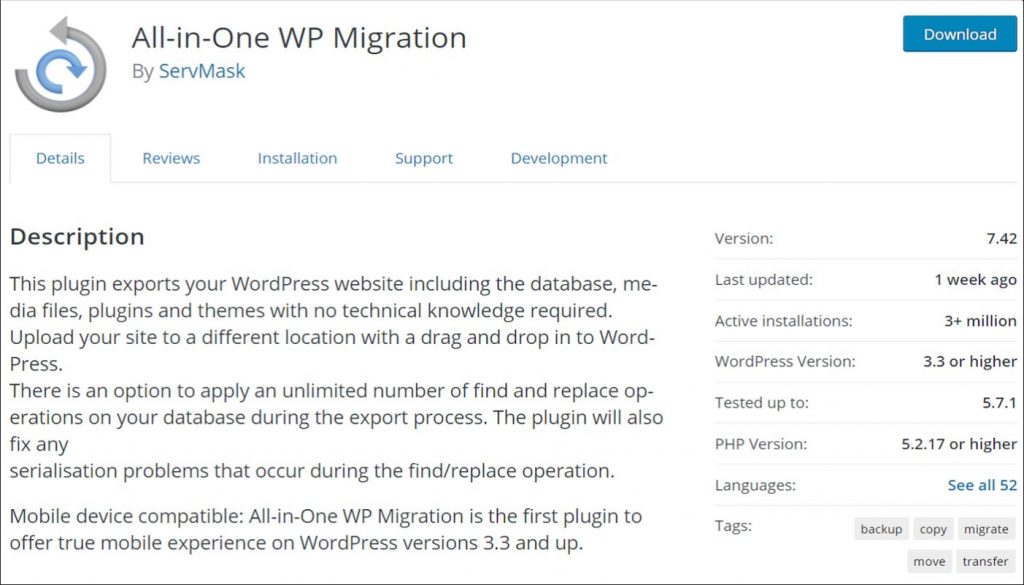
Just as the name suggests, All-in-One WP Migration is a robust website cloning and migration tool. Its developers boast that the plugin works with a huge number of hosting providers. In fact, one of the things that distinguish the plugin is its compatibility. For example, it’s designed to support all WP versions starting with 3.3 and PHP from 5.2 onwards.
WP Blazer
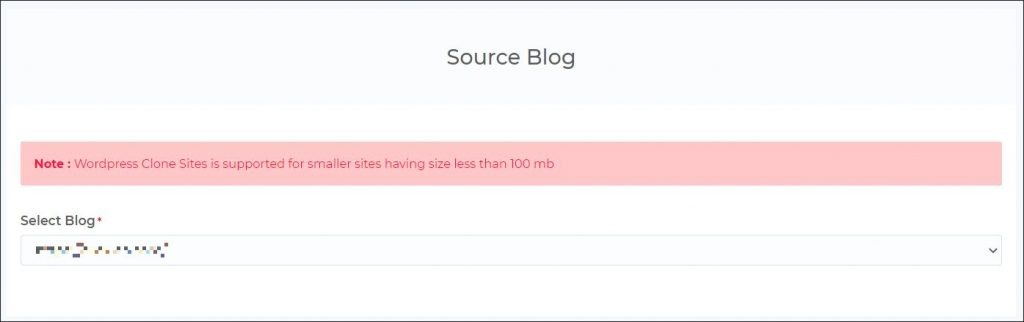
WP Blazer is a robust plugin that allows you to do a lot with your WordPress website. This includes cloning, as well as backing up your website.

Just like the aforementioned plugins, it boasts several integrations with cloud services. These include Amazon S3, Dropbox, Google Drive, Microsoft Azure, and a few other tools. However, please note that cloning of WordPress sites is supported only for smaller sites, that have a size of less than 100 MB.
While it may not seem like much, it’s more than enough to manage WordPress templates. This makes it a perfect tool to manage, secure, and recreate client or personal sites. Especially that you can manage your site in one convenient dashboard.
When Should You Consider Cloning Your Website?
The most obvious situation when you’ll want to explore how to clone a WordPress site is moving it to another host. Creating a clone is the fastest and most convenient way to do that. A good WordPress cloning plugin will recreate its complete structure together with the site’s database. All that can be done on a new server, in just a few clicks.
But, migration is not the only reason why you should think about having a clone of your website. The other ones include:
Security
Your website is your asset. Whether it represents your brand, your business (or your clients’), or it’s an investment – you need to keep it safe.
One of the ways to protect it is to own a secured copy of it in an external location that’s not tied to your server. It can be a different server or even a physical location like an external drive. You can also have a clone of it ready to go live should your primary WordPress installation stop working.
Speed of Operations
Let’s say you’re building online assets like blogs, or build websites for clients. While the final product that you deliver to your clients is different each time, each site can be built on identical foundations.
For example, you may want to use the same set of plugins. A pre-configured clone can save you plenty of time each time you start a new project. Instead of having to install each plugin manually, you can now deploy the site from a clone and have everything ready in just a few clicks.
Experiments and upgrades
One of the core rules in website development is never to perform any work on the live site. Instead, you want to do all the work and testing on a development or staging environment.
Ideally, you want your staging environment to mirror the production (live site). And, unless your web server is capable of creating one, the easiest way to do it is to clone your production site.
And, here’s how to do just that – in 10 easy steps.
Clone a Wordpress Site: 10 Simple Steps
Step 1. Identify why you want to clone the website
Before you dive deep into our guide on how to clone a WordPress site, think of why you need a clone in the first place. While it may sound simple, having a clear goal in mind helps you get the most out of your clone.
Let’s say you’re looking to create a template that you can keep recreating for every client that buys an eCommerce website package.
Before you clone the site, list down all the plugins and options that you may want in such a template. That way, you increase the chance that you won’t forget anything. The more things you put in the template, the more time you’ll save with each recreated website. That’s assuming you don’t include stuff you don’t need!
Step 2. Pick a plugin
Next, look at available plugins. If all you need is a clean template with a few plugins and basic settings, try WP Blazer’s WordPress clone feature. That way, you can keep all your client sites under one roof while getting access to other WP Blazer features.
But, what if you need to clone a robust live site with all its bells and whistles and move it to another server? In this case, you might want to try UpdraftPlus or Duplicator. In this guide, we’re going to use the latter.
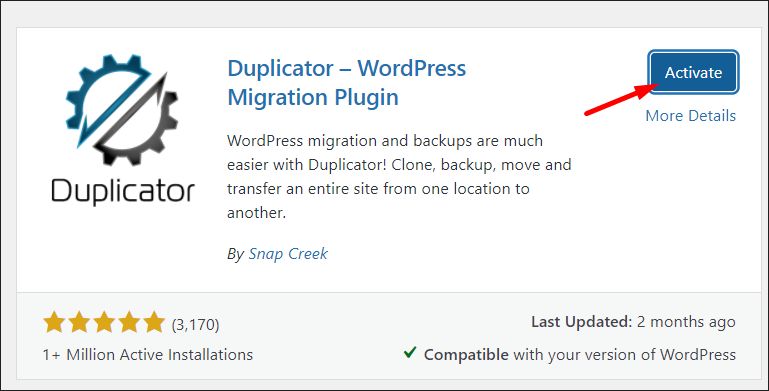
Step 3. Install and Activate Selected Plugin
Once you’ve picked a plugin, head over to Plugins > Add New in the WordPress dashboard. There, type in the name of the plugin and, once you see it in the search results, click Install Now.

After the plugin gets installed, activate it.
Keep in mind that if you’ve selected a premium plugin, it may not be available in the repository. In this case, you may need to download it from the developer’s server and upload it manually to your WP website.
Step 4. Review Duplicator Website Package Settings
The next step in our how to clone a WordPress site guide is to start working with our newly installed plugin. Head over to Duplicator and click Packages.
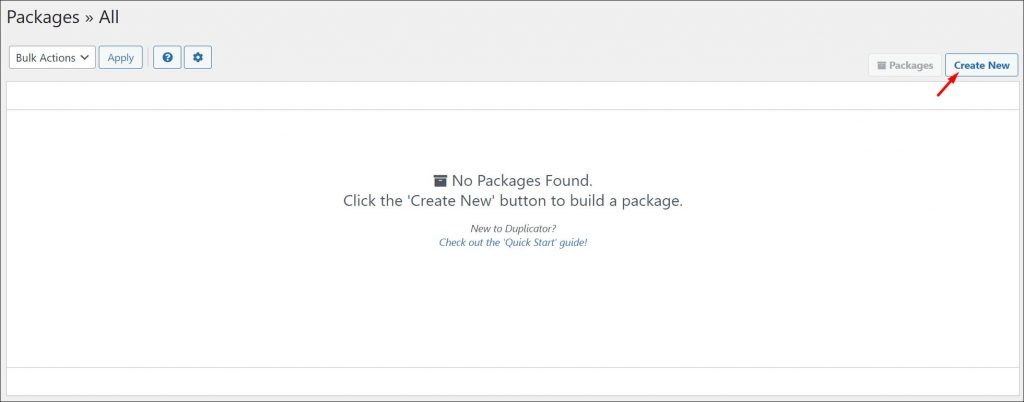
As you’ll see, we have no packages yet. Let’s click Create New to start creating one.
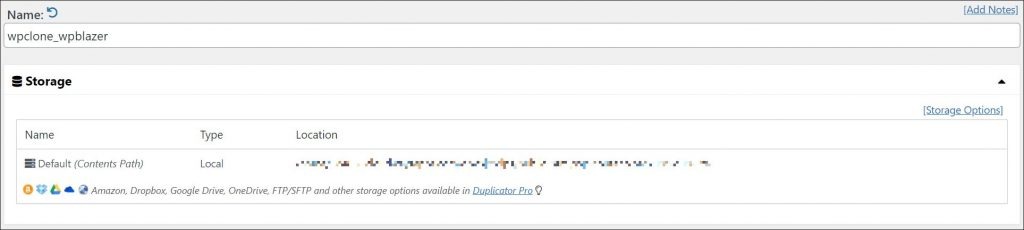
First, you’ll be asked to select a name for your package and to confirm its location. In the free version, you can only create the package on the server and then download it to your computer.
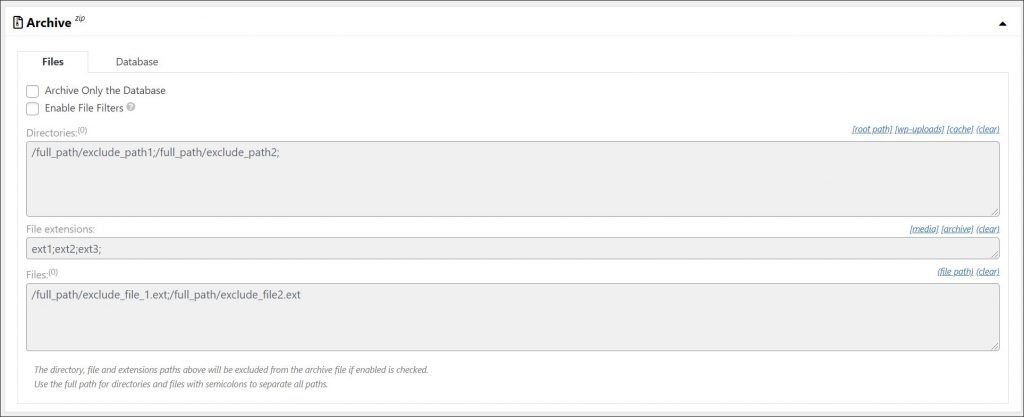
Next, you can edit archive settings. You can also exclude certain files:
As well as database tables:
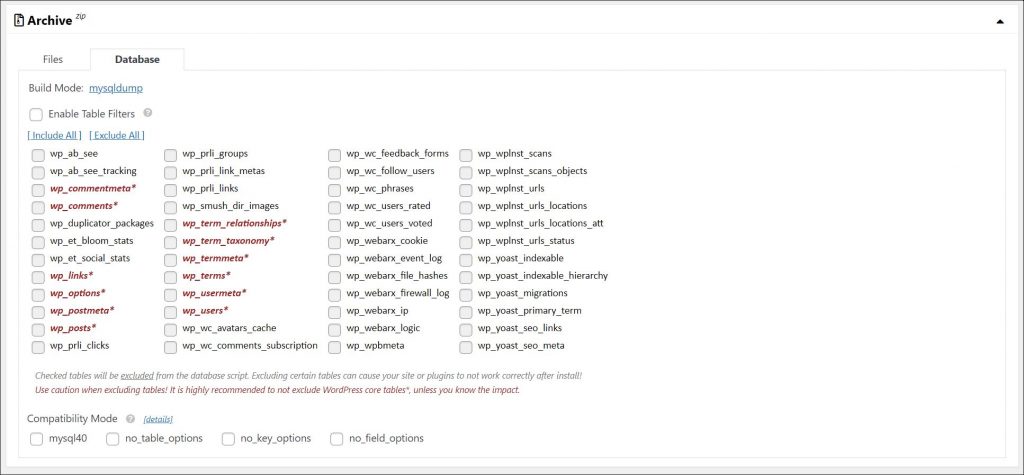
Remember that excluding certain tables might lead to data loss or even break the site. Unless you’re 100% sure what you’re doing, it’s best to leave the archive setting untouched for now.
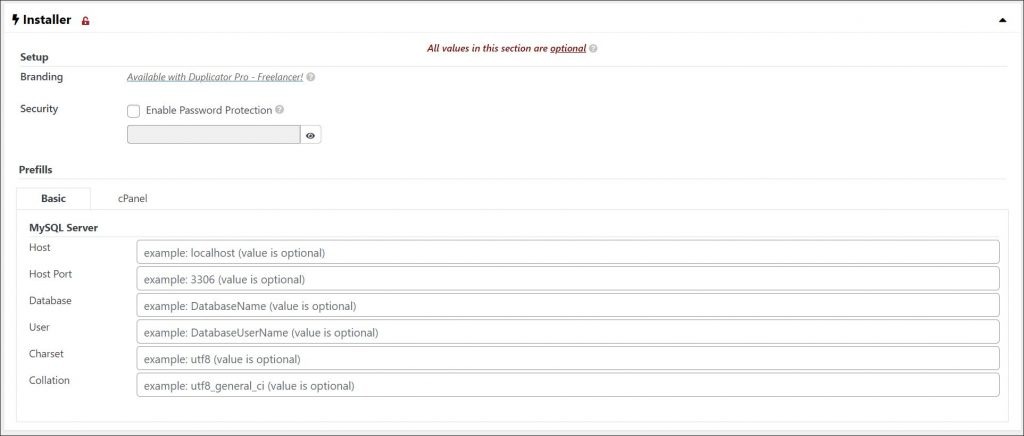
When you scroll down, you'll see you can also edit Installer file settings. Again, unless you know you need to make any specific changes – let’s leave these untouched too.
When you’re done reviewing settings, hit Next to get to the next step.
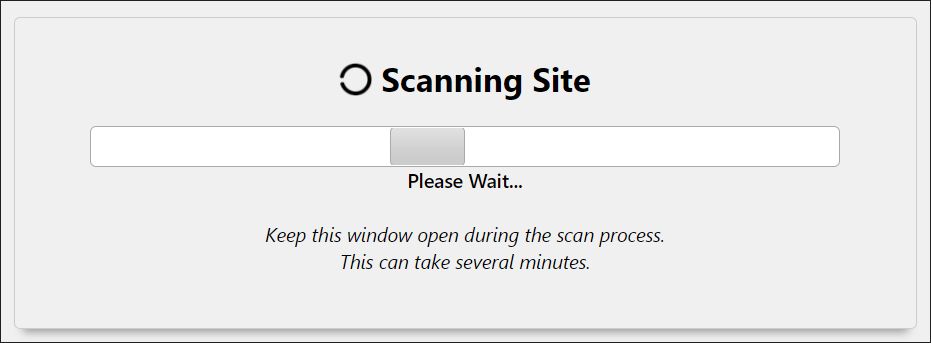
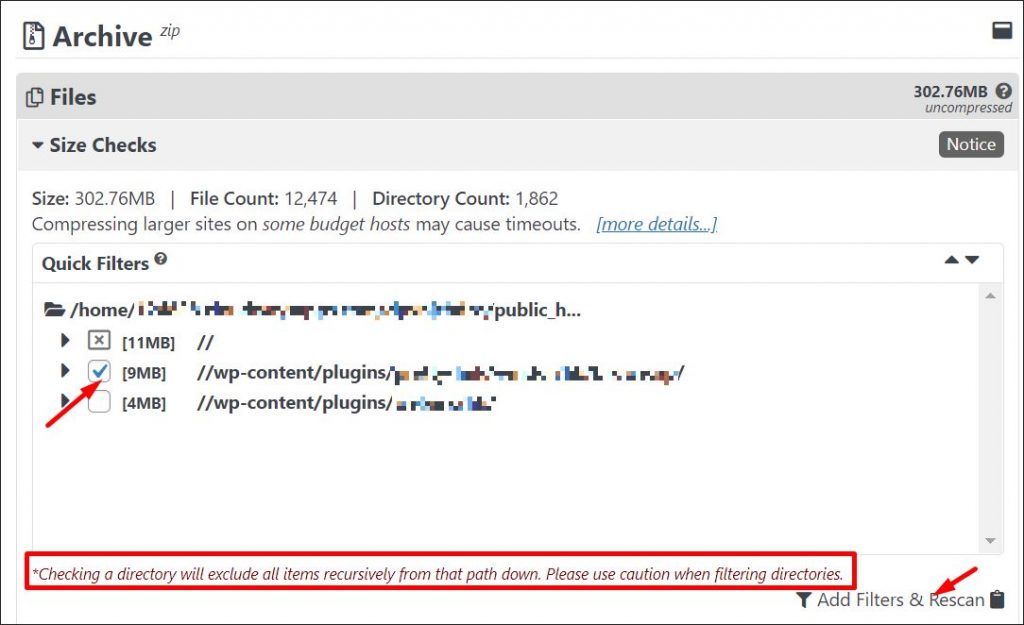
Step 5. Review Package Scan Results
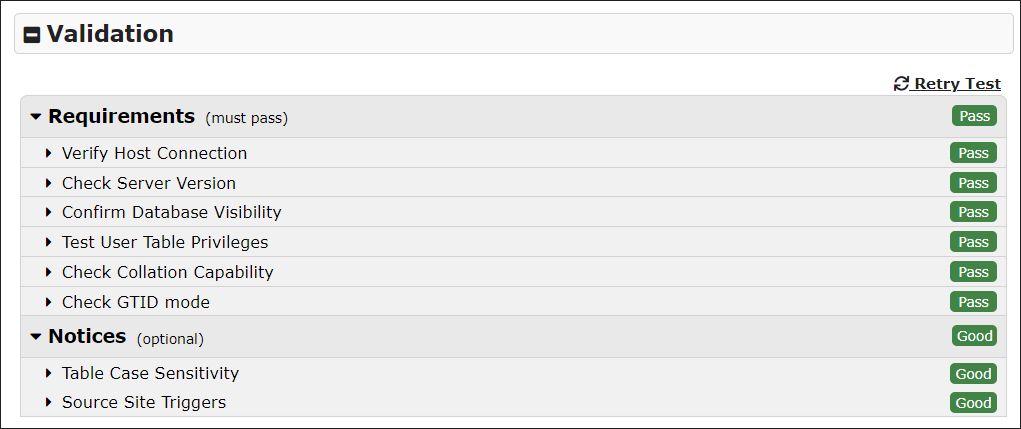
Once you set everything up, Duplicator will scan the site to see if it’s ready to clone. Usually, the process won’t take more than a few minutes.
Ideally, the results that you get should look similar to those in the below picture. The more “green” you get, the better. In our case, we got one Notice. Let’s see what it’s about.
Of course, if all the results are “green”, feel free to hit Build and proceed to the next step.

The notice that we’ve received is a warning that, because of the size of our website, we may experience a timeout. Because there are no big files we could exclude, we can just tick that we agree to continue the build process and hit Build.
Of course, should you want to exclude anything from the build, all you need is to select the file. But, if you’re unsure if it’s safe to exclude it – it’s better to leave the file in the archive.
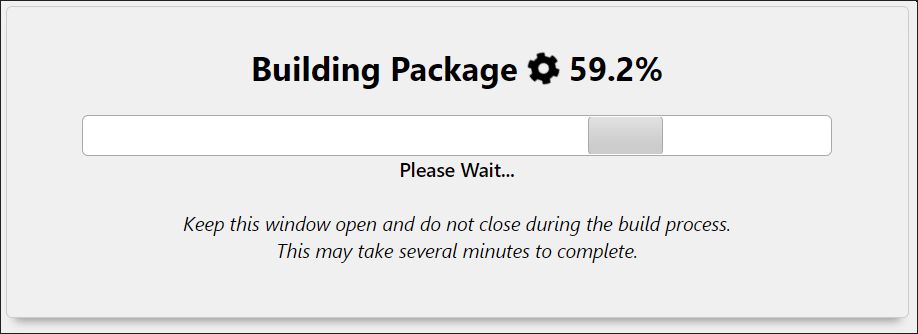
If there's nothing else you'd like to adjust - hit Build. Then, wait a moment for the package to get created.
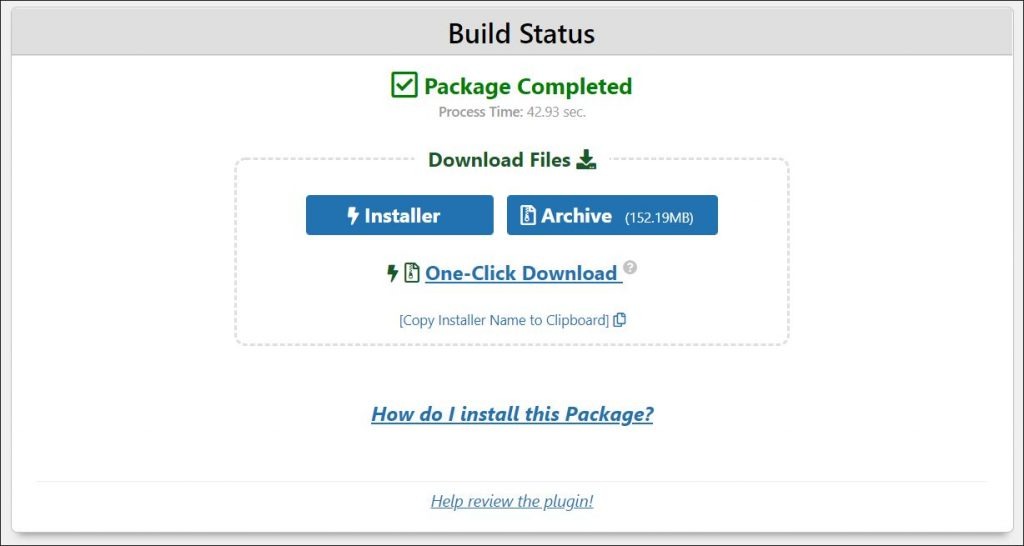
Step 6. Download the Package to Your Computer
Finally, we’re right in the middle of our how to clone a WordPress site guide. And, we got the website cloned already! The last step before moving it to the new server is to download the files. Hit the Installer and Archive buttons to download them!
Step 7. Upload the archive to the new location
Next, we need to upload the archive to the new server. In our case, we want to use the package to create a staging environment. To access the server, we’ll use Filezilla.
First, let’s connect to the server. If you don’t have FTP access details, ask your hosting provider for them.
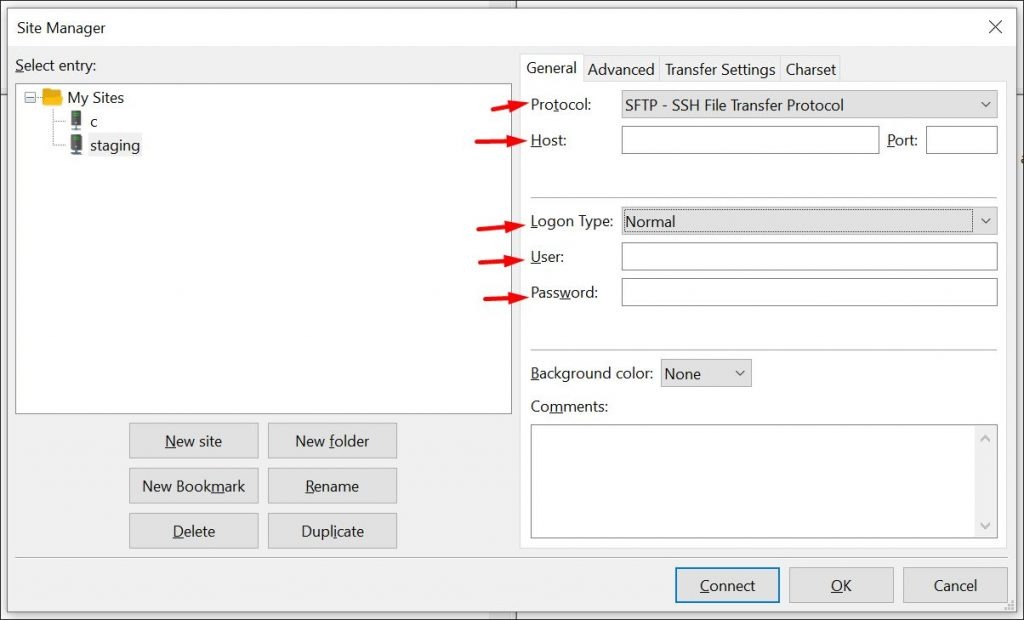
Open Filezilla and go to File > Site Manager (or hit Ctrl + S):
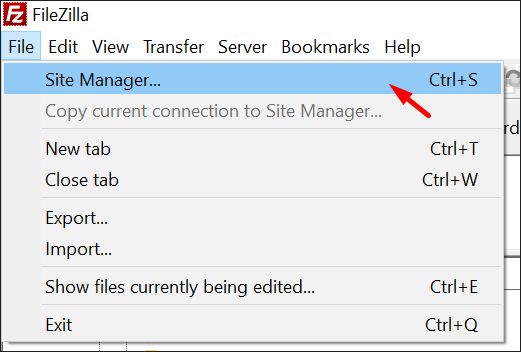
Here, name the site and fill in the login details. See if SFTP protocol will work (if not, select FTP + encryption). Then, input the host IP and port.
When choosing the logon type, leave it as normal – unless the instructions from your hosting provider tell you otherwise. Input user and password details and hit connect. Filezilla will automatically save the website for future use.
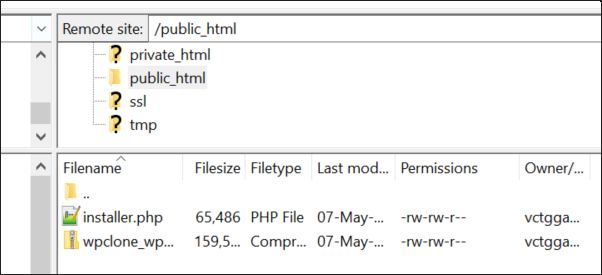
Next, head over to the “public_html” folder and drag-and-drop your website files there. This is how it should look like once you upload them:
Note: If you’re creating a staging on a subdomain (recommended), you’ll need to go to your domain registrar’s and point the subdomain to the new server IP. It should look something like this:

Of course, you’re free to use whatever name you want for the staging environment.
Step 8. Unpack Website Archive in the New Location
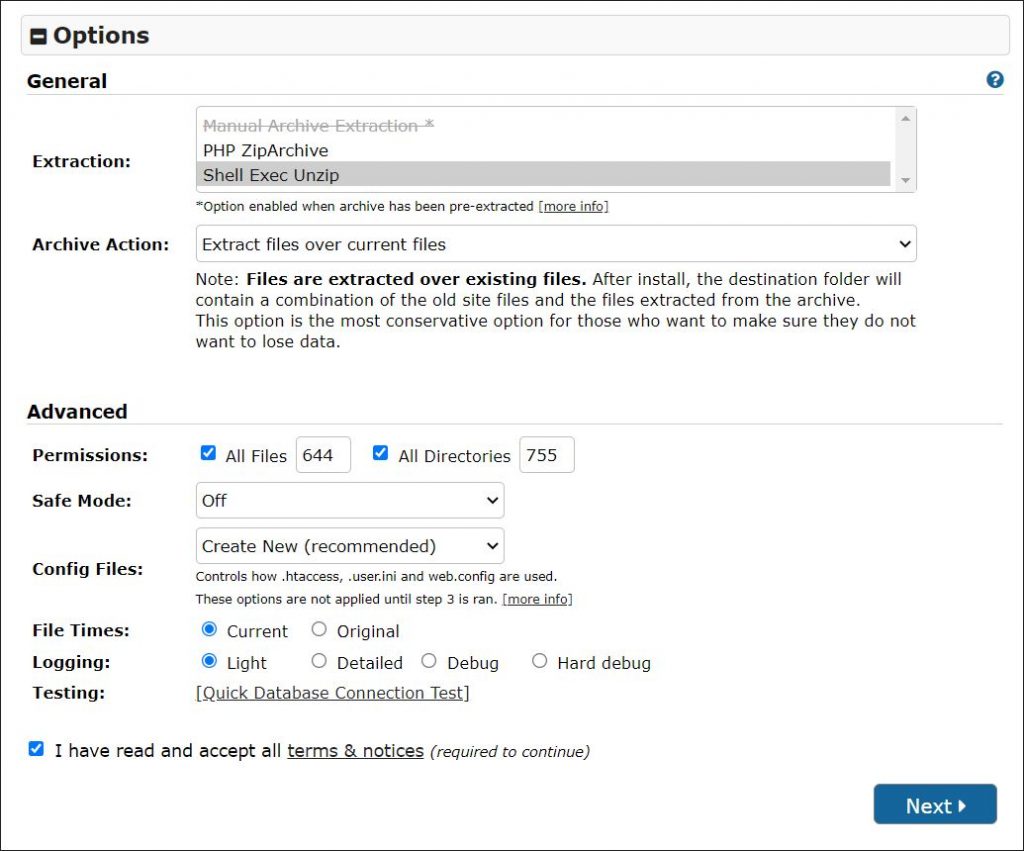
Once you have the files on your server, it’s time to “install” the website. Head over to yourdomain.com/installer.php to execute the file.
In our case, we’ll go to staging.domain.com, because we’re creating a staging environment. You should see Duplicator’s panel. If there were no issues during installation, everything will be marked in green:

Before you begin the installation, you can also edit file permissions. 644 for files means the owner can read and write them, while other people can read them only. 755 for directories means that the owner can read/write and execute them, while others can only read or execute.
For your site’s security, it’s best to leave those permissions as is. But, should you ever need to change them for a single file, this table explains where do the numbers come from.
If you’re ready, read and accept terms & notices and hit Next.
Then, wait a minute or two for the files to get ready.

Step 9. Prepare and Install MySQL Database
Next, you’ll be asked to provide MySQL database details. If you don’t have those, you should be able to find the details (or create a new database) in your control panel. Alternatively, reach out to your hosting company support team.
Once you have all the details, set the installation type to “basic” and enter the database name, username, and password.
Keep in mind that the installation process will erase all data from that database.
At the bottom, there are additional options you can edit – but, you don’t have to change anything in there.
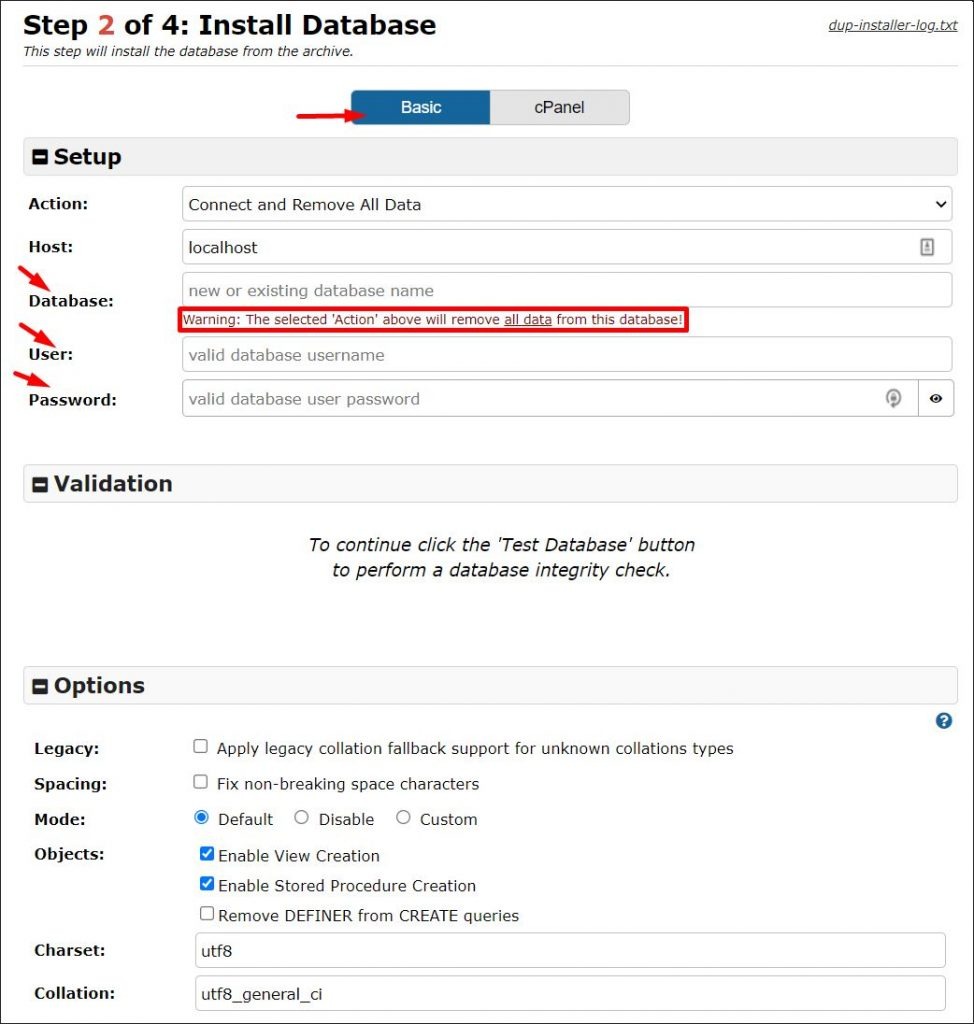
When you’re ready, scroll down to the bottom and hit “Test Database”. If everything is set up correctly, you should see something like this in the Validation section:
If all tests pass, hit Next to proceed with database installation. You’ll be asked to confirm that you want to overwrite the database.
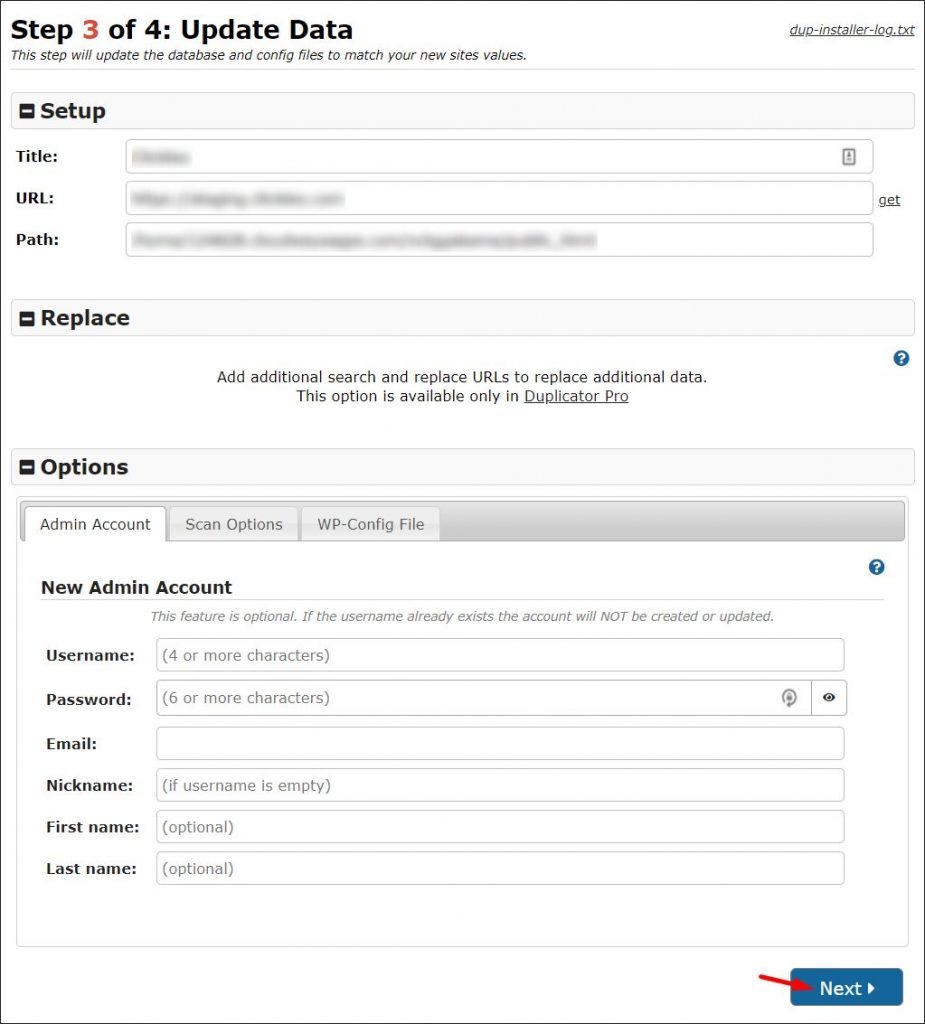
Once the database is configured (it shouldn’t take more than a few seconds), you can update Database data.
Here, you can check the site title, URL, folder path, as well as update/create an admin account. If you already have an admin user, there’s no need to create a new one.
After the data gets updated, you’ll be taken to a summary of your installation. If everything went smooth, there should be no errors and you’re free to proceed to Admin login. That’s where you’ll finalize the cloning process.
Also, feel free to check the Auto delete installer option. If there were no problem with the installation, there’s no point in keeping it on your server.
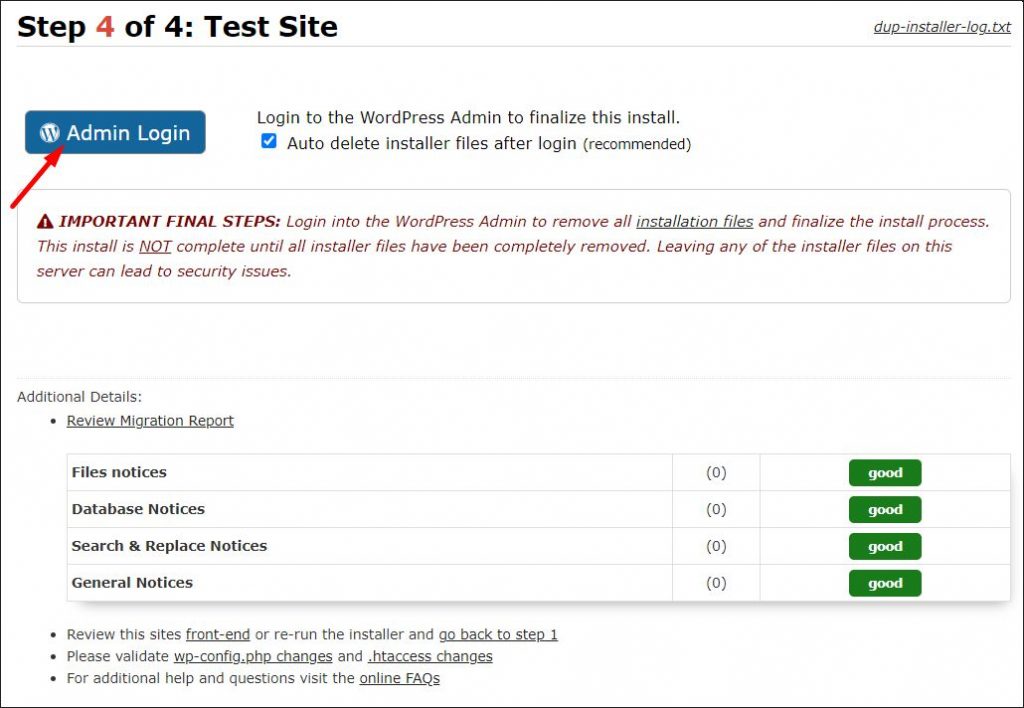
Log in to WordPress to finalize the installation. You should see a confirmation that all installation files got removed:

Step 10. Check that everything is working correctly.
The last thing that you need to do is to test your website. Remember that even though the site passed all Duplicator tests, you still should see if everything loads correctly.
Start by going over all plugins and reviewing their settings. Are there any functions that got turned off, or any errors that pop up? While these are unlikely to happen, moving servers, changing IPs and database names could result in some website issues.
Once you review the plugins, visit the most important pages on your website. See if they load correctly on both mobile and desktop. Remember to test your website in private mode. Also, don't forget to hard-refresh (Ctrl + F5) to clear the browser cache.
If you’re collecting emails, you can also try to sign up to see if the connection with your autoresponder is working fine. If everything is working – congratulations. You’ve officially cloned and moved your website.
And what if you could manage all your websites and their templates in one convenient dashboard? Check out the WP Blazer Clone feature and create website templates for yourself or your clients in just a few clicks.
And, if you’re looking to create a secure backup of your site, no need to learn how to clone a WordPress site at all. WP Blazer can create automated backups and send them to the cloud drive of your choice. Head over to this page to find out more.